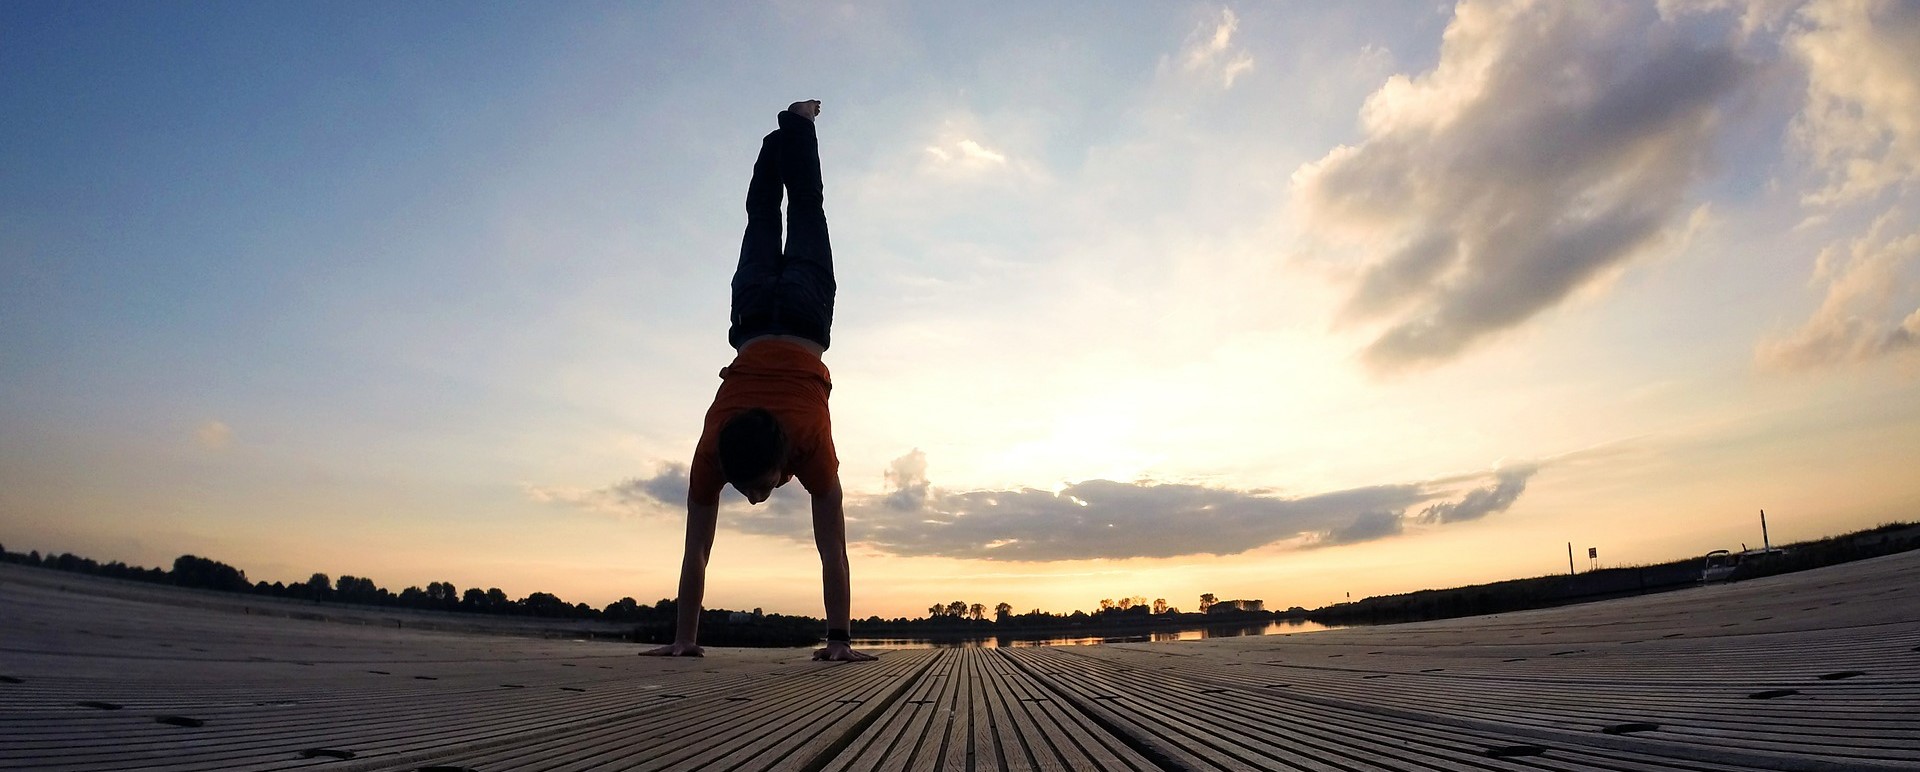
How Many Calories Should I Eat Every Day? A TDEE Calculator for Total Daily Energy Expenditure1/20/2021 “Steve, how many calories should I eat every day? I have goals!” Great question. Knowledge is power, so today, we are going to make you more powerful by calculating your Total Daily Energy Expenditure (TDEE). Of course, “knowing is half the battle.” The other half is what you actually DO with your TDEE information! Fortunately for you, we’ve helped thousands of Online Coaching Clients lose weight and get healthy, and TDEE is just one of many factors we consider when building a specific strategy for somebody’s goals. Okay FINE, I’ll share the other factors and strategies below too. Simply click on the section below for quick reading, though I’d recommend you read the whole enchilada to properly apply your TDEE to your life:
THE NERD FITNESS TOTAL DAILY ENERGY EXPENDITURE CALCULATOR
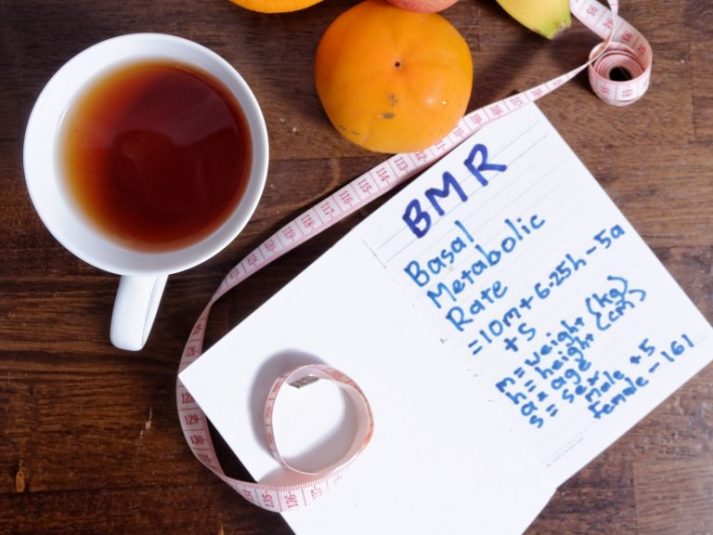
We’re going to start off by doing some math. Don’t worry, our robot calculator (beep boop boop) will do all the hard stuff for you. We will need to know your height in inches, your weight in pounds, and an idea on your activity level. (Use the metric system? I wish we did too here in the States! Click right here for our Metric calculator). Although you can adjust it, I want you to set your “Activity Level” as “Sedentary,” (I’ll explain why in a minute): Nerd Fitness Total Daily Energy Expenditure Calculator(Note: we have used The Mifflin-St Jeor Equation to create this calculator! [1]) Hooray! You now know estimates of your BMR and TDEE![2] You may be thinking, “Ah, Steve, what do either of these mean?” I got you boo. Make sure you write down your two numbers, and then move onto the next section. If you’re already starting to get overwhelmed, have no fear! We help hundreds of men and women calculate their calorie goals, and we’d love to help you too! WHAT IS BASAL METABOLIC RATE (BMR)?
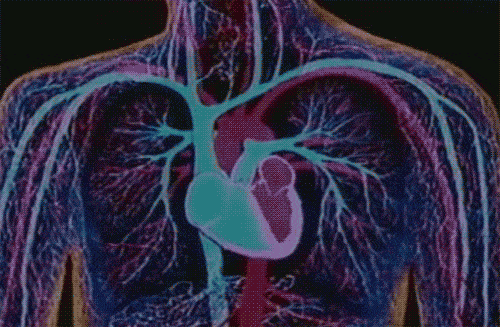
Basal Metabolic Rate (BMR) is the total amount of calories needed to keep your body functioning. Breathing, cell production, pumping blood, and keeping your body temperature up all require calories to function. This means that even when you sit perfectly still, you still use plenty of calories keeping your body in good working order. “Basal” more or less means “basic,” so you can think of BMR as the number of calories needed for basic daily functions. Your sex, weight, and height will all affect the number of calories you need, which is why they are variables in our equation above. The taller you are, or the more you weigh, the higher your BMR will be. There is simply more of you to fuel: more blood to pump, more cells to produce, more body mass to transport and manage. Your age will also factor in: the older you get the lower your BMR will be. Roughly two-thirds of the calories you need each day go into keeping your body running. The other third? That goes into powering your motion. You know, because going from one place to another requires energy. So does lifting stuff. So let’s talk about Total Daily Energy Expenditure (TDEE) next. WHAT IS TOTAL DAILY ENERGY EXPENDITURE (TDEE)?Total Daily Energy Expenditure (TDEE) is an estimate of how many total calories you burn in a day. Since your BMR calculates the calories you need for a state of rest, to get a true total we need to factor in movement and exercise. 
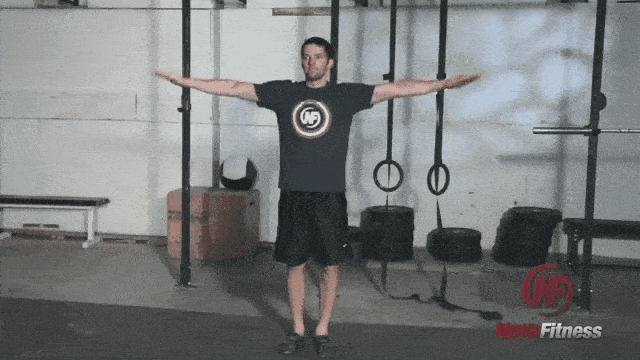
To do this, we’ll take your BMR and multiply it by an “Activity Level” factor.[3] Activity Levels can be thought of as the following: Sedentary. You regularly have to tell Netflix you are still watching. You don’t intentionally exercise at all. Sedentary = BMR x 1.2 Lightly Active. You casually stroll through your neighborhood a few times a week. On average, you walk for exercise about 30 minutes a day. Another way to think about this would be 15 minutes per day of vigorous exercise like running or lifting weights. Light Active = BMR x 1.375 Moderately Active. If we called the gym on a weeknight looking for you, they’d find you. This averages out to about one hour and 45 minutes of walking (for exercise, not going around your house) a day, or 50 minutes of vigorous exercise a day. Moderately Active = BMR x 1.55 Very Active. You work in construction during the day and you’re on the company softball team. This averages out to about four hours and 15 minutes of walking (again, for intentional exercise) a day, or two hours of vigorous exercise. Very Active = BMR x 1.725 If you’re following along at home, you may notice that different Activity Levels can make a big difference in the calories burned. Let’s use some numbers: Suppose you’re male, 35 years old, weigh 200 pounds, and are six foot even (72 inches). You’re also wearing a recently ironed collared shirt and it looks great on you. It really brings out your eyes. Awesome shirt or no awesome shirt, we know your BMR comes in at 1,882 calories given the variables we identified. Meaning you’ll need roughly 1,900 calories for basic bodily functions. This is where things get interesting. If you’re Sedentary, we’ll multiply 1,882 (BMR) by 1.2 to get a TDEE of 2,258, which means you’ll need 2,258 calories to maintain your current weight, support bodily functions, and to walk around your house, to go from your car to your office, from your office back home, etc. Let’s imagine a scenario where you are not Sedentary. Instead, we’ll calculate that you are Lightly Active, meaning you walk around your neighborhood a few times a week. We take your BMR of 1,882 and multiply it by 1.375 to get a TDEE of 2,588. The difference between Lightly Active and Sedentary is 230 calories, about what you’d find in a single glazed donut. 
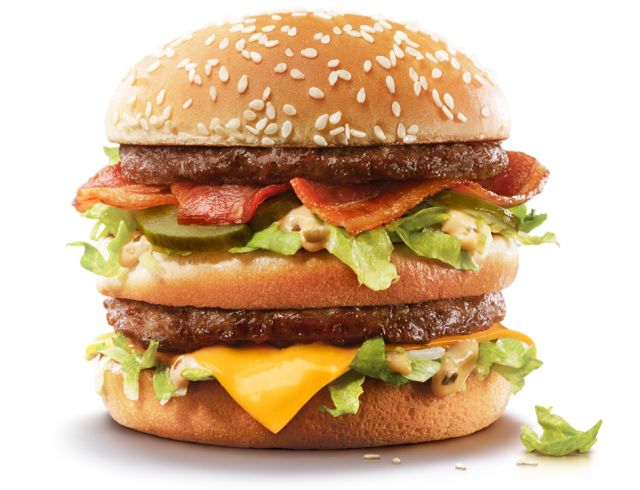
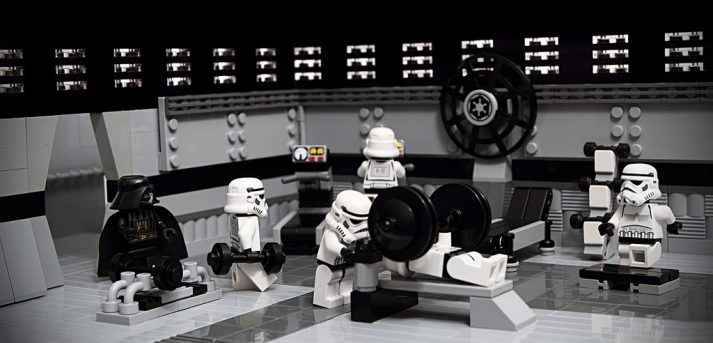
Let’s keep going. Let’s say you hit your local gym a few times a week for strength training practice. And on your off days, you do a little yoga and take walks. This will push you into the “Moderately Active” category. We take your BMR of 1,882 and multiply it by 1.55 to get a TDEE of 2,917. The difference between Sedentary and Moderately Active would be 659 calories. That’s an extra meal’s worth of calories! For reference, here are some examples of things that are roughly 650 calories: #1) A whole meal’s worth of Sicilian fish with sweet potatoes: #2) One Big Mac® with Bacon: #3) A large Orange Dream Machine® from Jamba Juice: All of those three options above are the same number of calories – however, they vary widely in how full they will make you feel! IMPORTANT NOTE: I’ve used the word “estimate” several times in this article and will continue to do so. It’s important to know that although BMR and TDEE can be helpful caloric information for many, there are limitations in their calculations. Hormones, genetics, medicine, and macronutrient ratio can all influence calorie needs for individuals. Said another way, it’s CRUCIAL that we take our BMR and our TDEE as a starting point, not the definitive “answer.” It’s the place we can start from, and then adjust based on how our bodies respond! As we’ve just seen, different Activity Levels can influence the TDEE greatly too. This is why Activity Level might be a “trap” when doing TDEE calculations! WHAT SHOULD MY ESTIMATED ACTIVITY LEVEL BE FOR TDEE?We people are notoriously bad at estimating our Activity Level. We tend to UNDERestimate how many calories we consume, and then OVERestimate how much exercise we’re doing (often by as much as 30-50%+ percent). Study after study demonstrates that people evaluate their movement and exercise greater than what it actually is.[4] Not only that, but our fitness trackers overestimate by at least 20% how many calories we expend through exercise too.[5] We think we’re working out “intensely” for 60 minutes and then overeat, assuming we have lots of extra calories in our “daily budget” to spare. However, when researchers look at stuff like heart rate, VO2 max, and calories burned, they determine that we actually only exercised “moderately.” What does this mean for regular people like you and me? If the goal is weight loss, you’re going to overestimate your activity level, and you’re going to underestimate how much you eat. When in double, pick the Activity Level below your initial guess. Instead of “Moderately Active,” pick “Lightly Active.” This will give you a more accurate estimate of your caloric needs, and give you a larger margin for error when trying to lose weight! The other thing to consider would be strength training. As we mention in our “Lose Weight and Build Muscle” article, strength training requires a lot of energy, not only for the exercise itself, but also for rebuilding muscle in the days following the activity. In general, we consider strength training to be “vigorous exercise,” which we highlighted above. If it takes 30 mins of walking a day to be “Lightly Active,” 15 minutes of daily strength training would roughly be equivalent. If estimating your Activity Level and TDEE is starting to freak you out: 
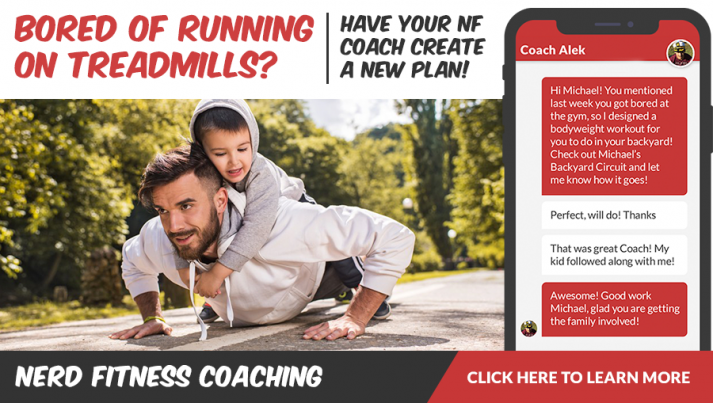
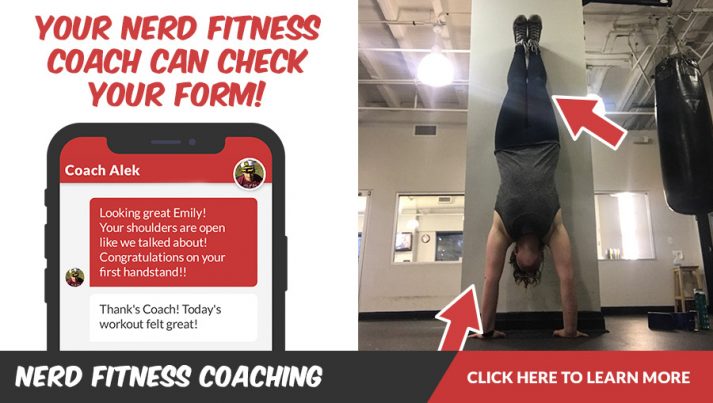
Trying to pick and calculate the right amount of calories to consume can be stressful. Especially if you’ve had trouble losing weight in the past. And that’s just the math part – we haven’t even got to the psychological part about how delicious pizza and ice cream are. It’s actually the reason we created our uber-popular 1-on-1 Coaching Program. We sought to take all the guesswork out of getting in shape, by creating a program to tell you exactly what to do. HOW DO I USE BMR AND TDEE FOR WEIGHT LOSS?If you’ve read this far into the article, I imagine you are interested in learning your Total Daily Energy Expenditure for weight loss. I also imagine you support my belief that The Shawshank Redemption is the greatest movie ever made: I mentioned earlier that if you are having trouble losing weight, it’s because you are eating too many calories. The TDEE we calculated above will give us a good estimate of calories you require each day – if your scale is staying constant: congrats! You found your ‘calorie equilibrium.’ This means your body burns just as many calories as you consume each day. However, I’m going to guess you’re here because your goal is to see the scale go down! Think of it this way: if your weight is fairly consistent, your body is currently in equilibrium. You burn the same number of calories that you consume every day. So, in order for you to lose weight, you need to start reducing your total calorie intake, which then forces your body to start burning the stored fat you have for energy. You’ve already calculated roughly how many calories you burn (your TDEE) on a daily basis, let’s see roughly how many calories you’re consuming each day too! (If your weight is staying steady, then these numbers should be relatively close – provided your tracking is accurate!) It’s this nerd’s humble opinion that the easiest way to track calories consumed is with an app. We live in the future. Use a smartphone and download one of the following to track your food intake:
You certainly don’t have to track your food forever. But a solid week’s worth of data will help you get a sense of the food you are consuming, especially if you eat roughly the same food each day. Not sure if you’re getting your portion sizes correct? Most people don’t. Consider a cheap food scale to educate yourself on actual portion sizes! You can also check out our guide How to Portion Control, which will teach you how to use your hand to estimate calories: The important thing is to compare your daily calories consumed to your TDEE. In order to lose weight, you need to have your calories consumed less than your TDEE on average. (If you’re currently thinking, “But Steve according to my stats I burn way more calories than I consume, but I’m not losing weight!” I would read this.) Some numbers to think about:
Basic math suggests if you want to lose one pound of body fat in a week (a sustainable goal for some), you need to create a caloric deficit of 500 calories a day: either through consuming 500 fewer calories, burning 500 more calories, or a combination of the two. When you consume fewer calories than you burn consistently, your body will have to start pulling from your stored fat to complete daily functions. Aka weight loss. Let’s imagine that your TDEE is 2,500. This means you’d want to consume around 2,000 calories a day to lose around a pound per week. As we discuss to great detail in “Why Can’t I Lose Weight,” sustained weight loss is largely a result of consistently managing the first half of the equation: “calories in.” Said another way: it’s much more difficult to sustainably increase your Activity Level than it is to reduce the calories you consume. After all, what’s more likely to become a lifelong habit? Making a substitution on the food you’re consuming, or suddenly finding the time to vigorously exercise for 90 minutes every single day after being a couch potato? 
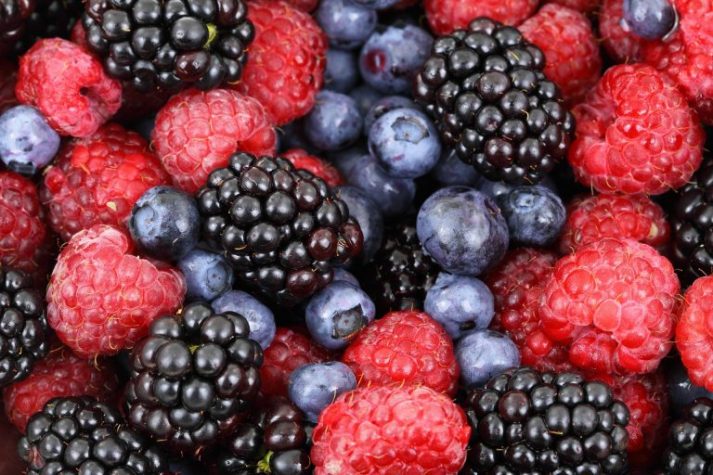
So start by focusing on fixing your food intake! What’s the easiest way to eat fewer calories consistently? By prioritizing REAL food. Why? Because real foods are more likely to fill you up and satisfy your hunger while also keeping you under your calorie intake goal for the day. Remember that example above comparing a full dinner vs a burger vs a shake: MOVING TOWARDS A HEALTHIER WAY OF EATING
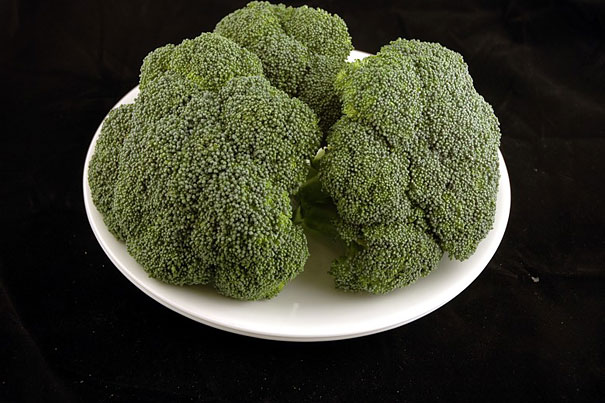
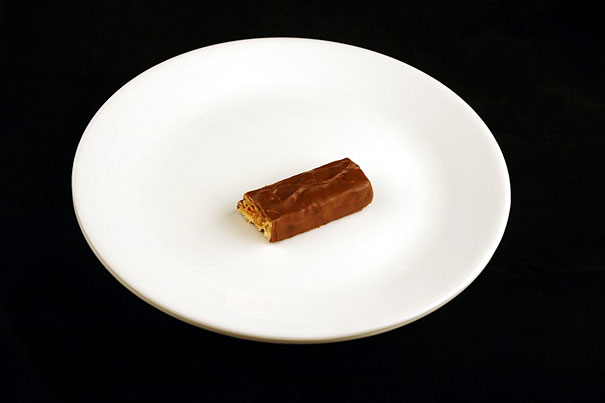
The Nerd Fitness philosophy on diet can be written in six words: “You’re smart. Eat more REAL food.” I lay it all out in our Beginner’s Guide to Healthy Eating, but again, you’re smart – you know what real food is: Food that grew in the ground, on a tree, ran on the land, swam in the sea, or flew through the air. Meat, fish, eggs, vegetables, fruits, nuts are all great examples of REAL food. This is what you should be eating more of. The fine folks at WiseGEEK did an awesome post where they took pictures of what 200 calories of a certain food looks like. 200 calories of broccoli gets you enough broccoli to fill up an entire plate: Or half a Snickers bar: Yeah… By eating REAL food, you have a MUCH higher margin for error to stay under your calorie goal for the day.
Put it all together: If you want to create a caloric deficit consistently, focusing on REAL food gives you the best fighting chance to stay under your daily target of calories. And yes, I know a Snickers bar is way more delicious than broccoli – it was designed in a lab by scientists to be AMAZING! I’m not gonna tell you to never eat a Snickers ever again either. Instead, start being proactive about your food choices. If you want to eat a Snickers, plan for it by deliberately reducing your calorie intake in the meal before or after (or consider skipping a meal). And if the scale isn’t budging – you’re still eating too much! Want help with any of this? Many of our coaching clients found weight loss previously unattainable until one of our trained professionals objectively reviewed their life and provided actionable feedback. Now, some of them have lost between 50-100+ pounds! WHAT’S THE BEST DIET FOR WEIGHT LOSS?Should you do the Mediterranean Diet? Keto? Vegan? Paleo? Maybe! They all follow the same premise: by changing or eliminating certain food groups (or macronutrients), you’re more likely than not to eat a caloric deficit automatically. All diets will prioritize protein (as should you), but some diets are low fat and others are low carb. Every person will respond differently and will have more success with some than others. So yes, any diet can help you lose weight in the short term – just remember that you need to stick with the changes permanently to make the results stick permanently! After all, temporary changes create temporary results. I personally follow a mental model diet, that focuses on real food most of the time, and occasionally includes some junk food. I plan my week of eating ahead of time: #1) Minimize processed food – they’re designed for you to overeat them. Take a look again at that Snickers bar. Do you really think you’d only eat half of one to stick to 200 calories? Of course not. This argument is more or less the rationale for following a paleo diet. #2) Eat veggies. Vegetables are nutrient-dense and light on calories. Because of all the fiber, they are also tough to overeat. Imagine eating all that broccoli. Are you going for seconds? Probably not. So eat your veggies to help keep you full. Hate vegetables? I once was like you. Read “How to make vegetables taste good“. #3) Be wary of liquid calories. Cut back on soda, juices, smoothies, and any beverage with calories. Even most coffee orders (with sugar, cream, etc.) will have a ton of hidden calories. All these drinks are sugar bombs since there is no fiber to balance out all the carbs you are consuming. Stick to water, and unsweetened tea or coffee. Here are our thoughts on diet soda. #4) Prioritize protein. When your body heals itself, like after exercise, your body uses protein as the building block of muscle rebuilding. Outside of repairing your body, protein will also work to keep you full and satiated: 400 calories of chicken will leave you wayyy more full than 400 calories worth of Gatorade.[7] If you prioritize protein on your plate, you’ll be doing a lot of the heavy lifting on proper nutrition. As we lay out in our epic “How Much Protein Should I Eat?” guide, some great sources of protein include chicken, eggs, beef, pork, fish, nuts, legumes, quinoa, and most dairy products. These four points will help you on your journey to create a caloric deficit. Disclaimer: this is all easier said than done. After all, 70% of the country is overweight. Don’t worry though, because most of them don’t read Nerd Fitness. You do. This is like a strategy guide for life. We’ve helped thousands of people like you here at NF, and we really focus on nutrition. As we said, it’s 90% of the battle! It’s why we created our own free, fun 10-level nutritional system. Each level gets a bit more challenging and healthier, but you can progress at your own speed to make your changes stick. You can download our 10-Level Nutrition Guide when you sign up in the box right here:
Download our free weight loss guide
THE NERD FITNESS DIET: 10 Levels to Change Your Life
HERE’S WHAT TO DO TO LOSE WEIGHT WITH YOUR TDEELet’s recap this whole guide for you, with some actionable steps: #1)Determine your BMR and TDEE. This will be critical for computing your caloric deficit. They’re good numbers to keep in mind during the whole experiment. Calculate your TDEE here. #2) Track everything, as is, for one week. Log everything you eat. No judgment. If you eat five slices of pizza in a night, count every slice. This step alone has helped many Rebels turn their lives around. Consider a food tracking app or online tracker to educate yourself! #3) Compare numbers. Where is your current caloric intake at? How does this compare against your TDEE? If your intake is higher than your TDEE, you’re likely gaining body fat. We want to flip the equation. #4) Create a consistent caloric deficit. The easiest and most sustainable way to do this is to eat REAL food. Mixing in strength training and fun cardio can help too. #5) Track progress. Continue to track caloric intake to ensure you expend more calories than you consume. That’s it. You can do this. I know you can because many of our readers have done it themselves. Want help taking your next step after calculating your TDEE? I have MULTIPLE options for you. Pick the path below that best aligns with your goals and timeline: 1) If you want step-by-step guidance on how to lose weight, eat better, and get stronger, check out our killer 1-on-1 coaching program: 2) If you want an exact blueprint for how to eat better and get in shape, check out NF Journey. Our fun habit-building app helps you exercise more frequently, eat healthier, and level up your life (literally). Try your free trial right here: 3) Enlist in the Rebellion! We need good people like you in our community, the Nerd Fitness Rebellion. Sign up in the box below when you download our free weight loss guide!
Download our free weight loss guide
THE NERD FITNESS DIET: 10 Levels to Change Your Life
You can do this, and we got your back! -Steve PS: Seriously, how great is The Shawshank Redemption? I could quote that movie all day long. But if you don’t agree… ### All photo citations can be found right here.[8]
Footnotes ( returns to text)
via https://www.nerdfitness.com/blog/how-many-calories-should-i-eat-every-day-a-look-at-total-daily-energy-expenditure-tdee/
0 Comments
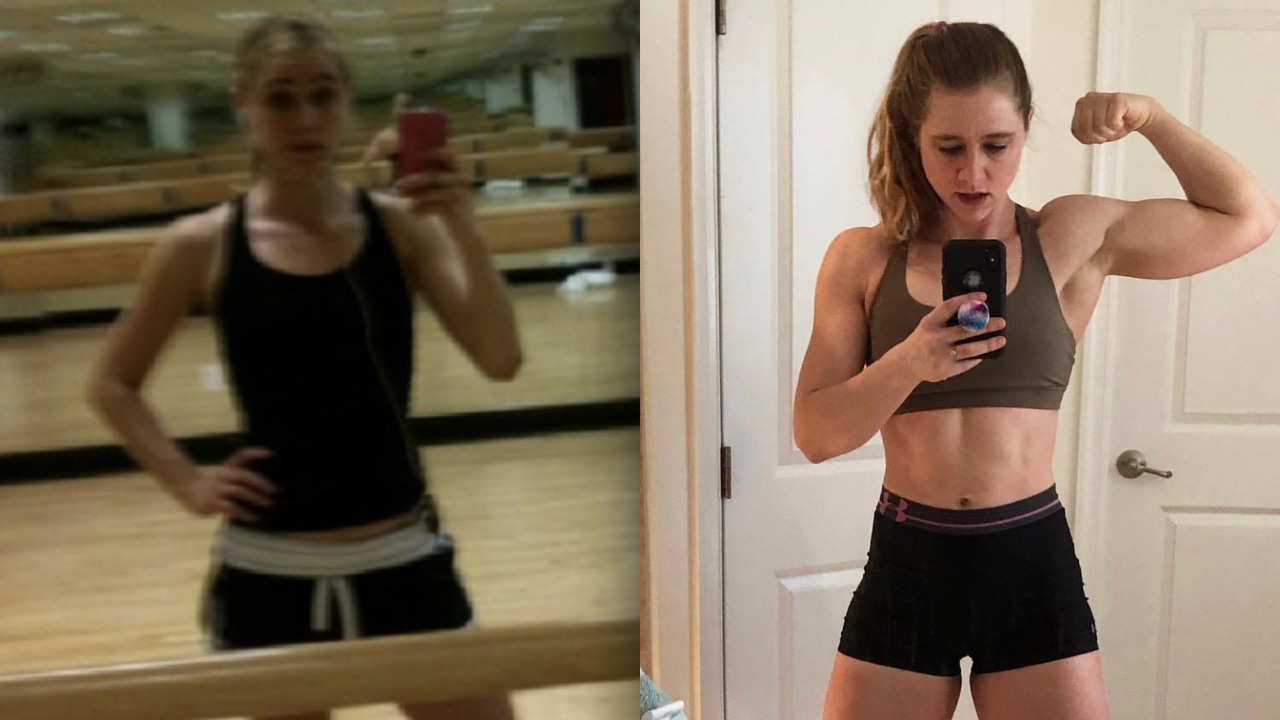
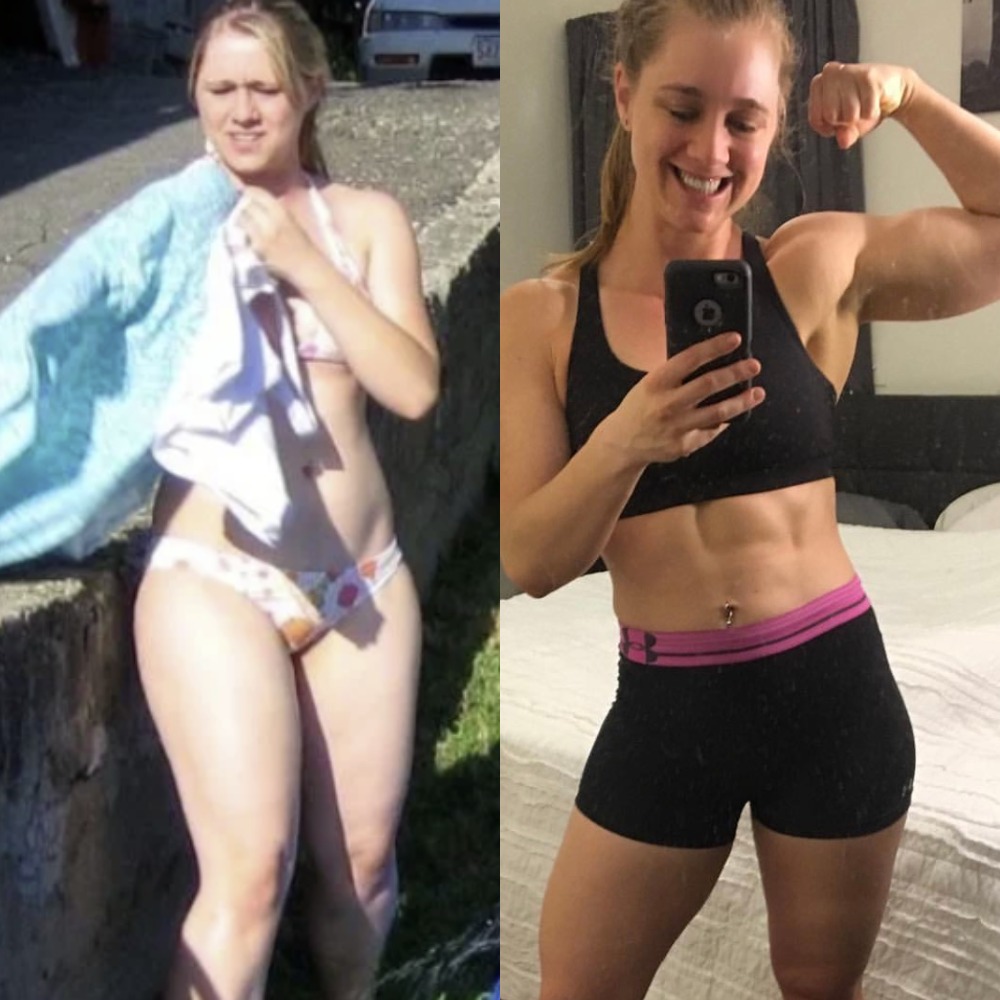
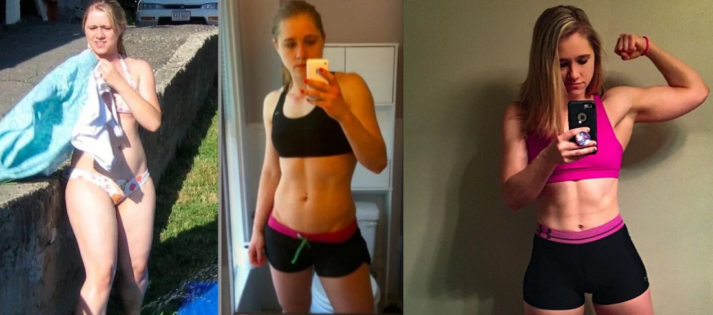
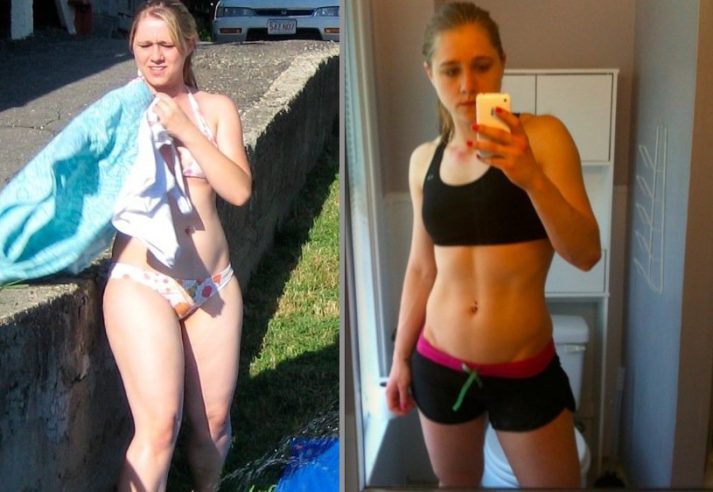
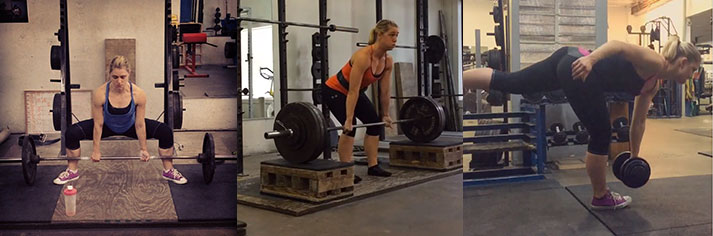
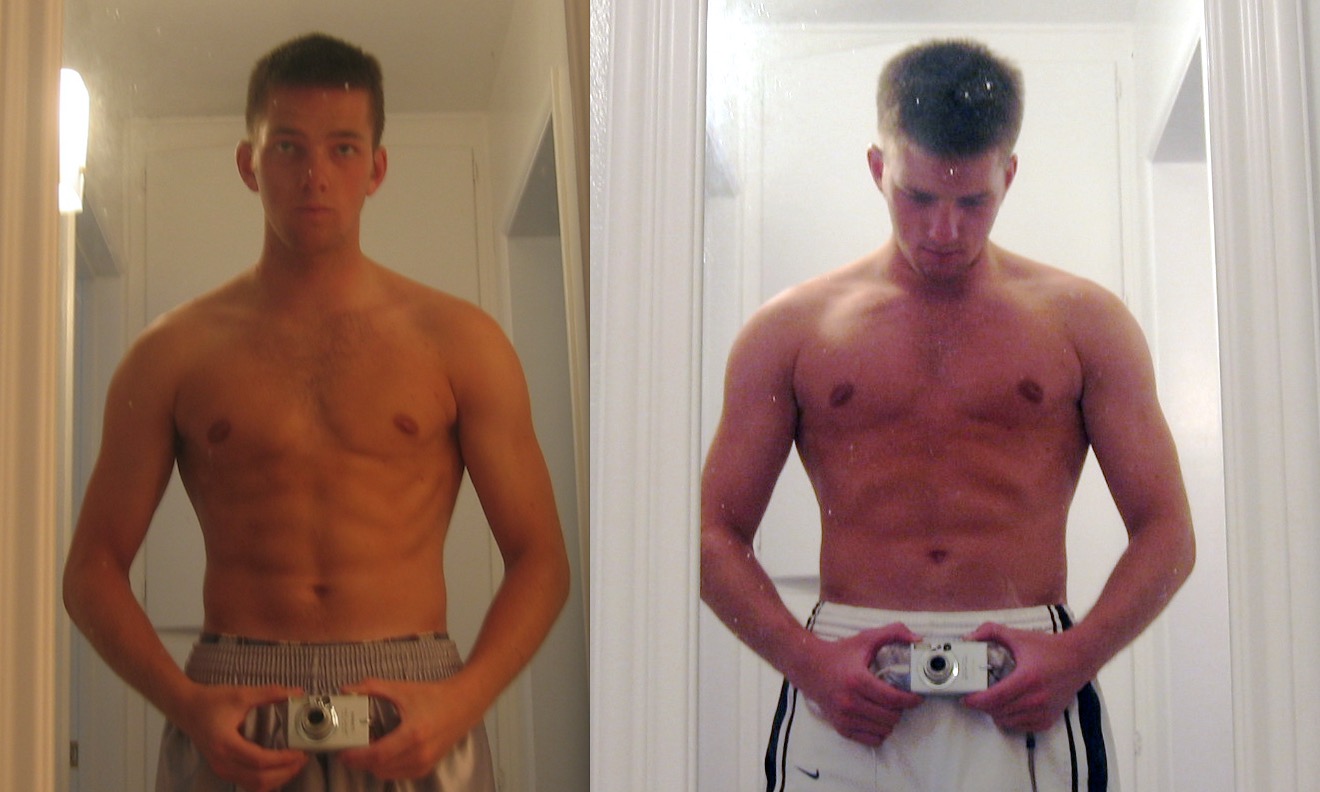
My name is Staci Ardison. I overcame an eating disorder, discovered a love for heavy strength training, and now I help women like you get stronger for a living. Believe it or not, I’m 50 pounds heavier in the photo on the right (and WAY stronger, and healthier, and happier!). I’m currently a lead coach here in the Nerd Fitness Coaching Program, where we train women to pick up heavy weights, get strong, and build confidence. Speaking of picking up heavy weights, here I am deadlifting 455 pounds: This is what I LOVE to do. In this Ultimate Guide to Building Muscle as a Woman, I’m going to be covering:
Why Building Muscle is Difficult for Some WomenAs Steve covered in “How to build muscle” and “How to bulk up for men,” the principles of weight gain are all the same regardless of your sex or gender: “If you want to gain weight, eat more calories than you burn regularly. Want to put on the right KIND of weight? Exercise and eat the right way too.” Now, there’s plenty of nuance to this when comparing men and women:
But that doesn’t mean it’s impossible! It just means we have to work harder for it. 
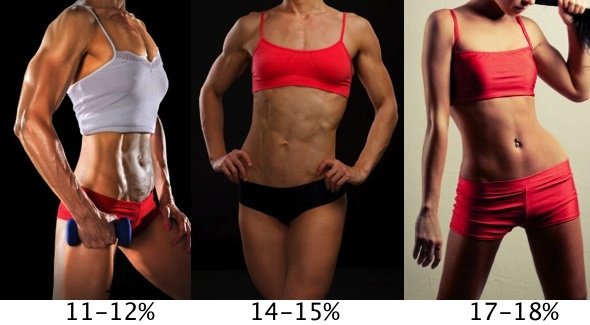
Ugh, I know. Now, one thing I want to touch on quick: if you see a woman who is absolutely jacked and at an extremely low body fat percentage, I guarantee she has been working her butt off for a very long time with the goal of building muscle. It’s not something that happens overnight, or by mistake. In addition, some women with larger amounts of muscle mass choose to take steroids to help assist them in gaining muscle, because we simply don’t have the hormones naturally to get to that size. So if you’d like to build muscle, but not as much as a professional bodybuilder – don’t worry, it’s not something that happens by accident. With that out of the way, let’s talk about body fat and body types: As we point out in that body fat percentage guide, we women can look very different at any weight depending on our body shape and how much muscle we have. It comes down to our own personal goals! This guide is going to primarily focus on two things:
We’ve helped thousands of women with our online coaching program, many of whom are trying to gain weight and strength train for the first time in their lives. Everybody is on their own journey, at their own pace, and everybody will end up with different results too! Should women build muscle? (7 Reasons Women should Grow Muscle)If it can be harder for women to gain muscle (compared to men), why go through the trouble? I’m glad you asked! Here are the top 7 reasons why women should strength train: #1) When you’re stronger – everyday life is easier. No need to call for help to get that 50lb bag of dog food off the top shelf, or carrying an air conditioner unit up a flight of stairs. LIFE is easier when you’re stronger. #2) Less injury risk – when you build strong muscles, you’re also building stronger bones, ligaments, and tendons, making you less prone to injury doing things you love (like playing in a quidditch league).[3] #3) Helps combat age-related muscle loss,[4] allowing us to remain independent longer as we age: #4) Muscle is harder to maintain, which means you need to eat more just to hold on to it.[5] #5) Reduce pain – having a strong body makes living easier on your joints, as well as allows you to hold a better posture, and reduce back / hip pain.[6] #6) Appearance – this is a personal preference! Some women like to have a lot of muscle, and some don’t. While you can’t spot reduce fat, you can choose to build more muscle in specific areas, changing your body shape. Growing up, I was an extreme pear shape, but due to strength training, I now have more of an hourglass shape. #7) Live longer – want to spend more time on Earth? Strength training and growing muscle will help you do just that.[7] How to Eat to Gain Muscle as a WomanAs we said above, gaining weight comes down to thermodynamics and science. Every day, we burn a certain number of calories just existing, which is called our BMR (basal metabolic rate). We then factor in our daily activity level, and get a number that is called our “total daily energy expenditure.” You can calculate yours below: (Click here for our Metric calculator). (Note: we have used The Mifflin-St Jeor Equation to create this calculator! [8]). Since we want to gain weight, we want to take our TDEE and add 250 calories to it to get our daily goal. This should result in gaining about half a pound per week. Now, although eating ANY EXTRA calories from any source will result in weight gain, our goal is to gain the RIGHT kind of weight, in a healthy way. And thus, we’ll be focusing our efforts on a “healthy muscle building” strategy. We could easily add more calories each day, and gain weight quicker, however, the slow method gives you the best chances at gaining mostly muscle, with minimal fat. The faster you try to gain weight, the higher the percentage that will likely be fat – so starting off at half a pound per week is a great place to start! In addition to the number of calories we’ll be adding, we also want to pay attention to the type of foods we’re eating. As we cover in our “Healthy Eating Guide,” we’re going to build muscle by consuming the three big macros in the correct quantities:
Let’s look at each of these individually: PRIORITY #1: PROTEIN Protein can come from any number of sources, including:
As we cover in our “How much Protein do I need?”, claims for the amount of protein required for muscle growth vary wildly from source to source (and athlete to athlete). Here is our recommendation:
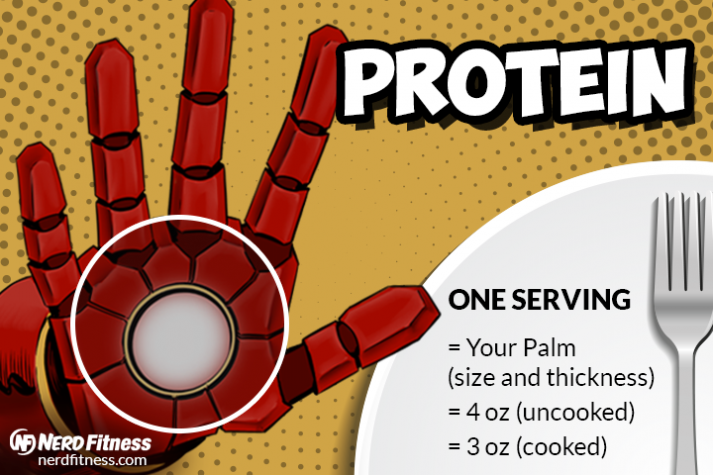
Let me simplify it for you: “To build muscle, target at least 1 gram of protein per pound of body weight (2.2 grams per kg).” If you’re curious, from our healthy eating article, this is what a portion of protein looks like: Here’s how much protein is in a serving of food:
Want to get more protein? Consider protein shakes. PRIORITY #2: CARBS After protein, we’ll be filling up our plate with calories from carbs (and fats). Here are foods full of carbohydrates you can prioritize:
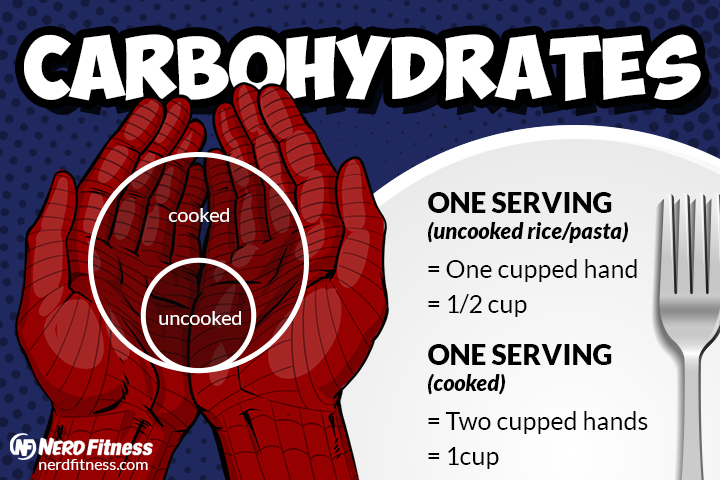
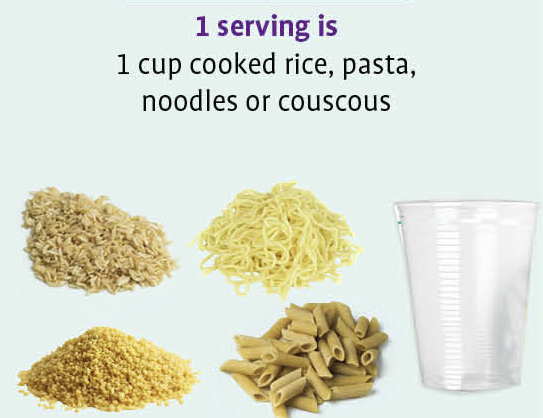
To help you get better at serving sizes: 1 serving of a starchy carbohydrate is 1 cupped hand (uncooked), or your two hands forming a cup (cooked). Here are some images to help you learn proper portion sizes (thanks to SafeFood): 
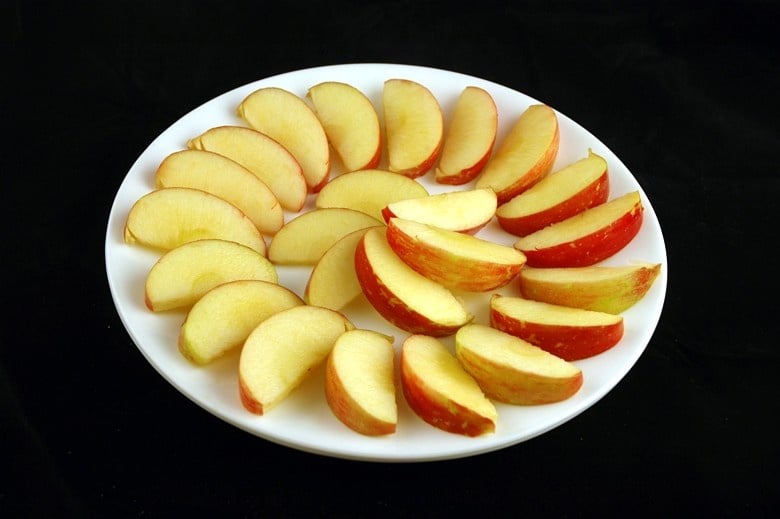
In addition to consuming carbohydrates from these sources, it’s okay to consume plenty of fruit while trying to build muscle! For reference, here is roughly 200 calories worth of an apple (thanks to WiseGEEK): You can read our full “Is fruit healthy?” guide to learn more. PRIORITY #3: FAT! Fat is a macronutrient that can help you reach your calorie goals (in the right quantity), as fat can be high in calories. Plus, you can eat lots of it without feeling full. Helpful if you’re trying to put on weight. Healthy fat can be found in foods like:
Science has recently come around on saturated fat too.[10] Once completely vilified, but now considered okay for moderate consumption. Saturated fats can come from things like:
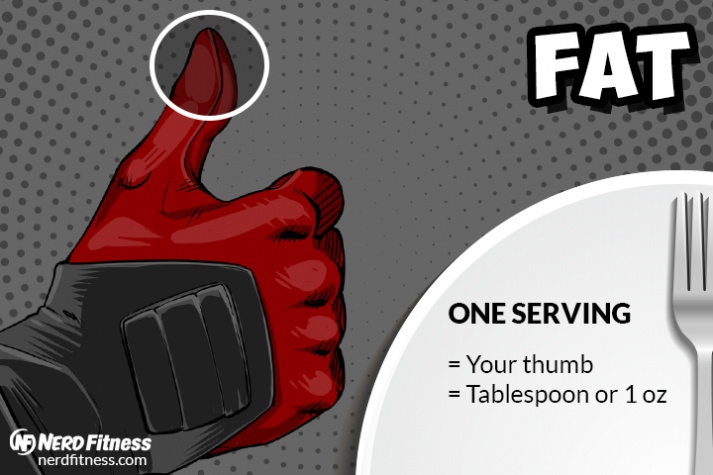
To help you gauge: a serving size of fat is roughly the size of your thumb! For reference, this is a single serving of almonds (162 calories): 
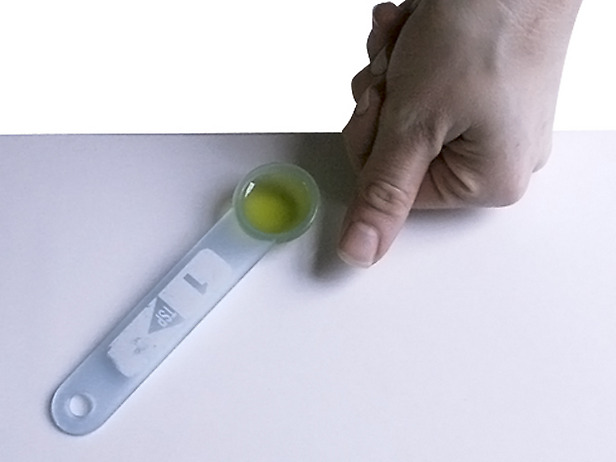
THIS is a serving of olive oil (119 calories): 
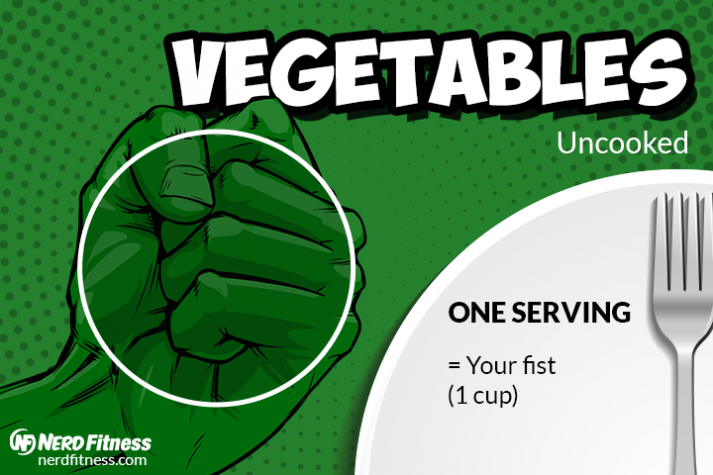
As you can see, you can eat an extra 500 calories of “healthy fats” by eating lots of “heart-healthy” fats like nuts or adding more olive oil to your meals. PRIORITY #4: VEGETABLES! Last but not least, you need vegetables in your diet. As you start to eat more food, your stomach, intestines, and other bodily functions will thank you for consuming more high-fiber vegetables! A serving of veggies is about the size of your fist. Here’s a quick, non-complete list of high-fiber veggies that can fill your plate:
BRINGING IT ALL TOGETHER: A HEALTHY MUSCLE BUILDING PLATE This plate and serving size stuff above is just to help you get started thinking about healthy food differently and in proper portion sizes. TO RECAP, HERE’S HOW TO EAT TO BUILD MUSCLE:
It really does come down to the following: If you are not gaining weight fast enough, you’re not eating enough. Increase your portions of carbs and fats! Whenever we work with coaching clients who struggle to build muscle, this is the area we target: adding more carbs and fats to each meal. 8 Strength Training Exercises For Women to Build MuscleYears from now, you’ll look back and thank “Past You” for starting strength training today. And don’t worry, I’m going to tell you exactly what to do so you can start strength training TODAY! Here’s why strength training is so important: when you eat a caloric surplus (more calories than your body needs each day), the extra calories have to go somewhere.
“Staci that sounds great, but I’ve never strength trained before, and I don’t know what I’m doing…Halp!” You might be saying into your computer or phone. Fear not! I’ll help. Strength training doesn’t need to be scary or overly complicated. Simply put, “strength training” means:
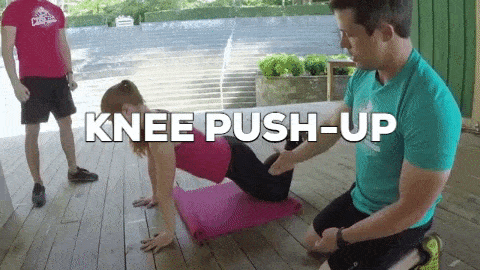
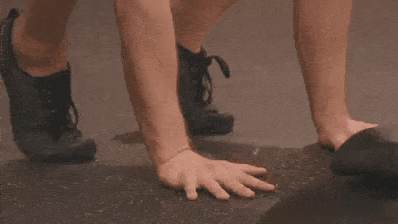
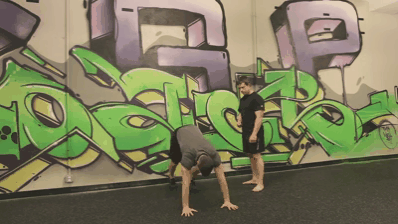
This means if you drop down and do ONE push-up or knee push-up right now… 
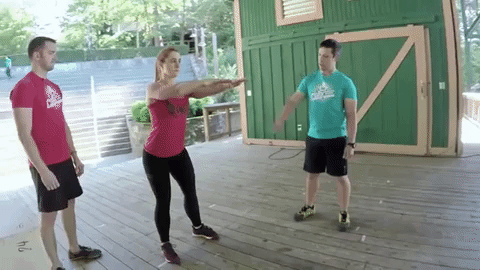
Technically, you’ve strength trained. Now do that and then do a bodyweight squat… Boom, you just did a strength training workout. Here’s what you need to know about strength training:
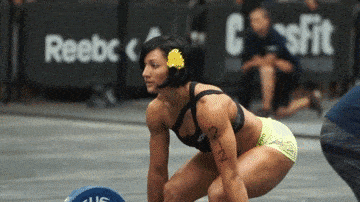
I used to be a CrossFit instructor, and my favorite thing about CrossFit was that it destigmatized barbell training and heavy lifting for many women. In order for us to strength train and build muscle, we’re going to approach this intelligently. We’re not going to pick up small dumbbells and do lots of reps. We’re not going to sit down at various machines and scroll through our phones while doing leg curls. Instead, we’re going to:
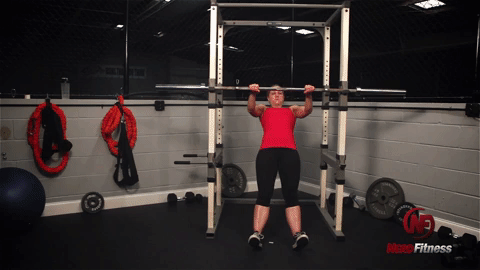
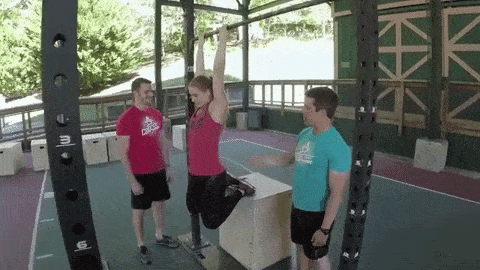
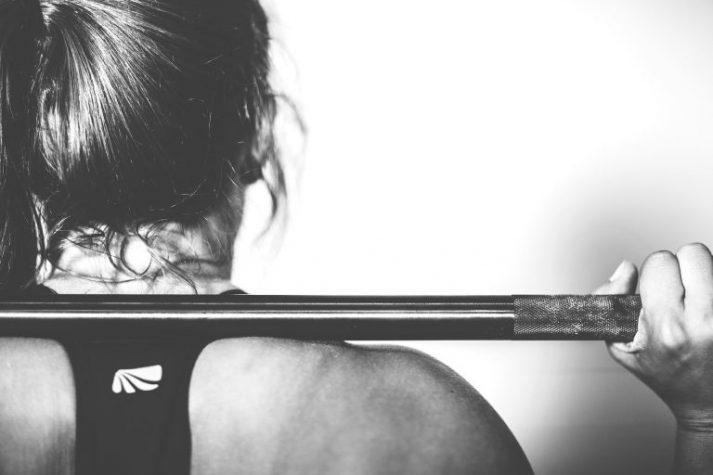
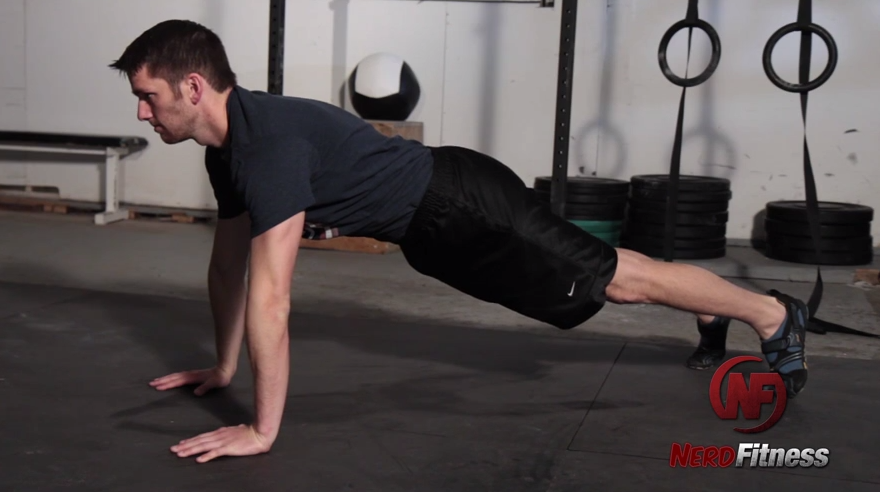
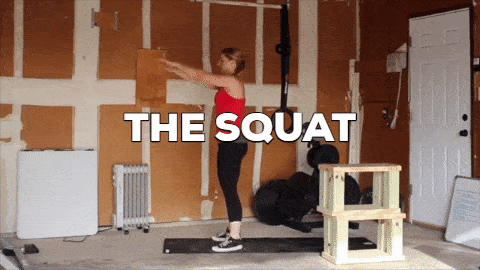
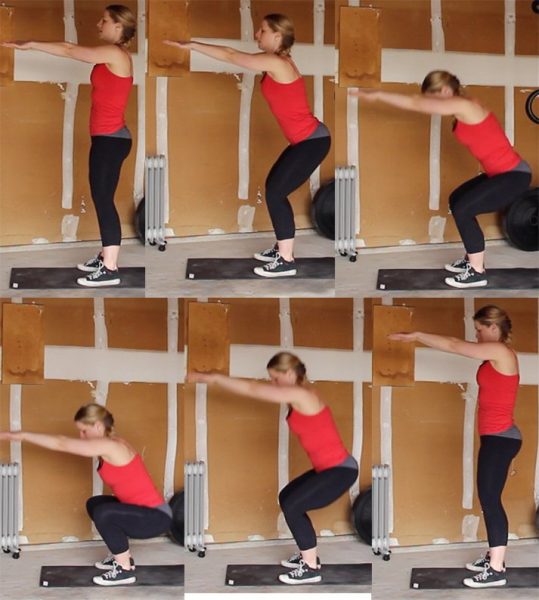
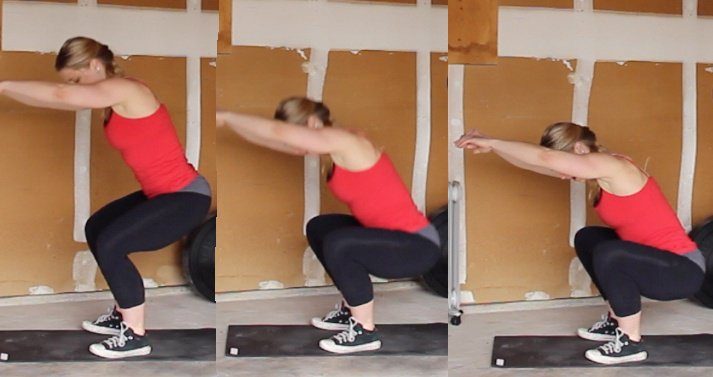
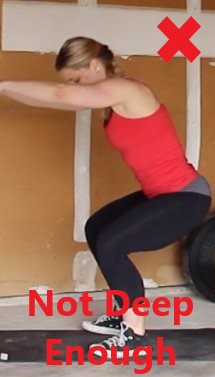
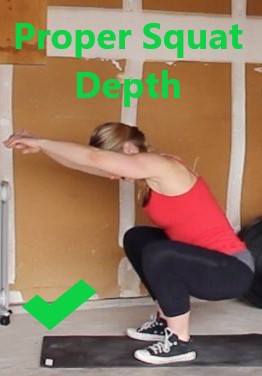
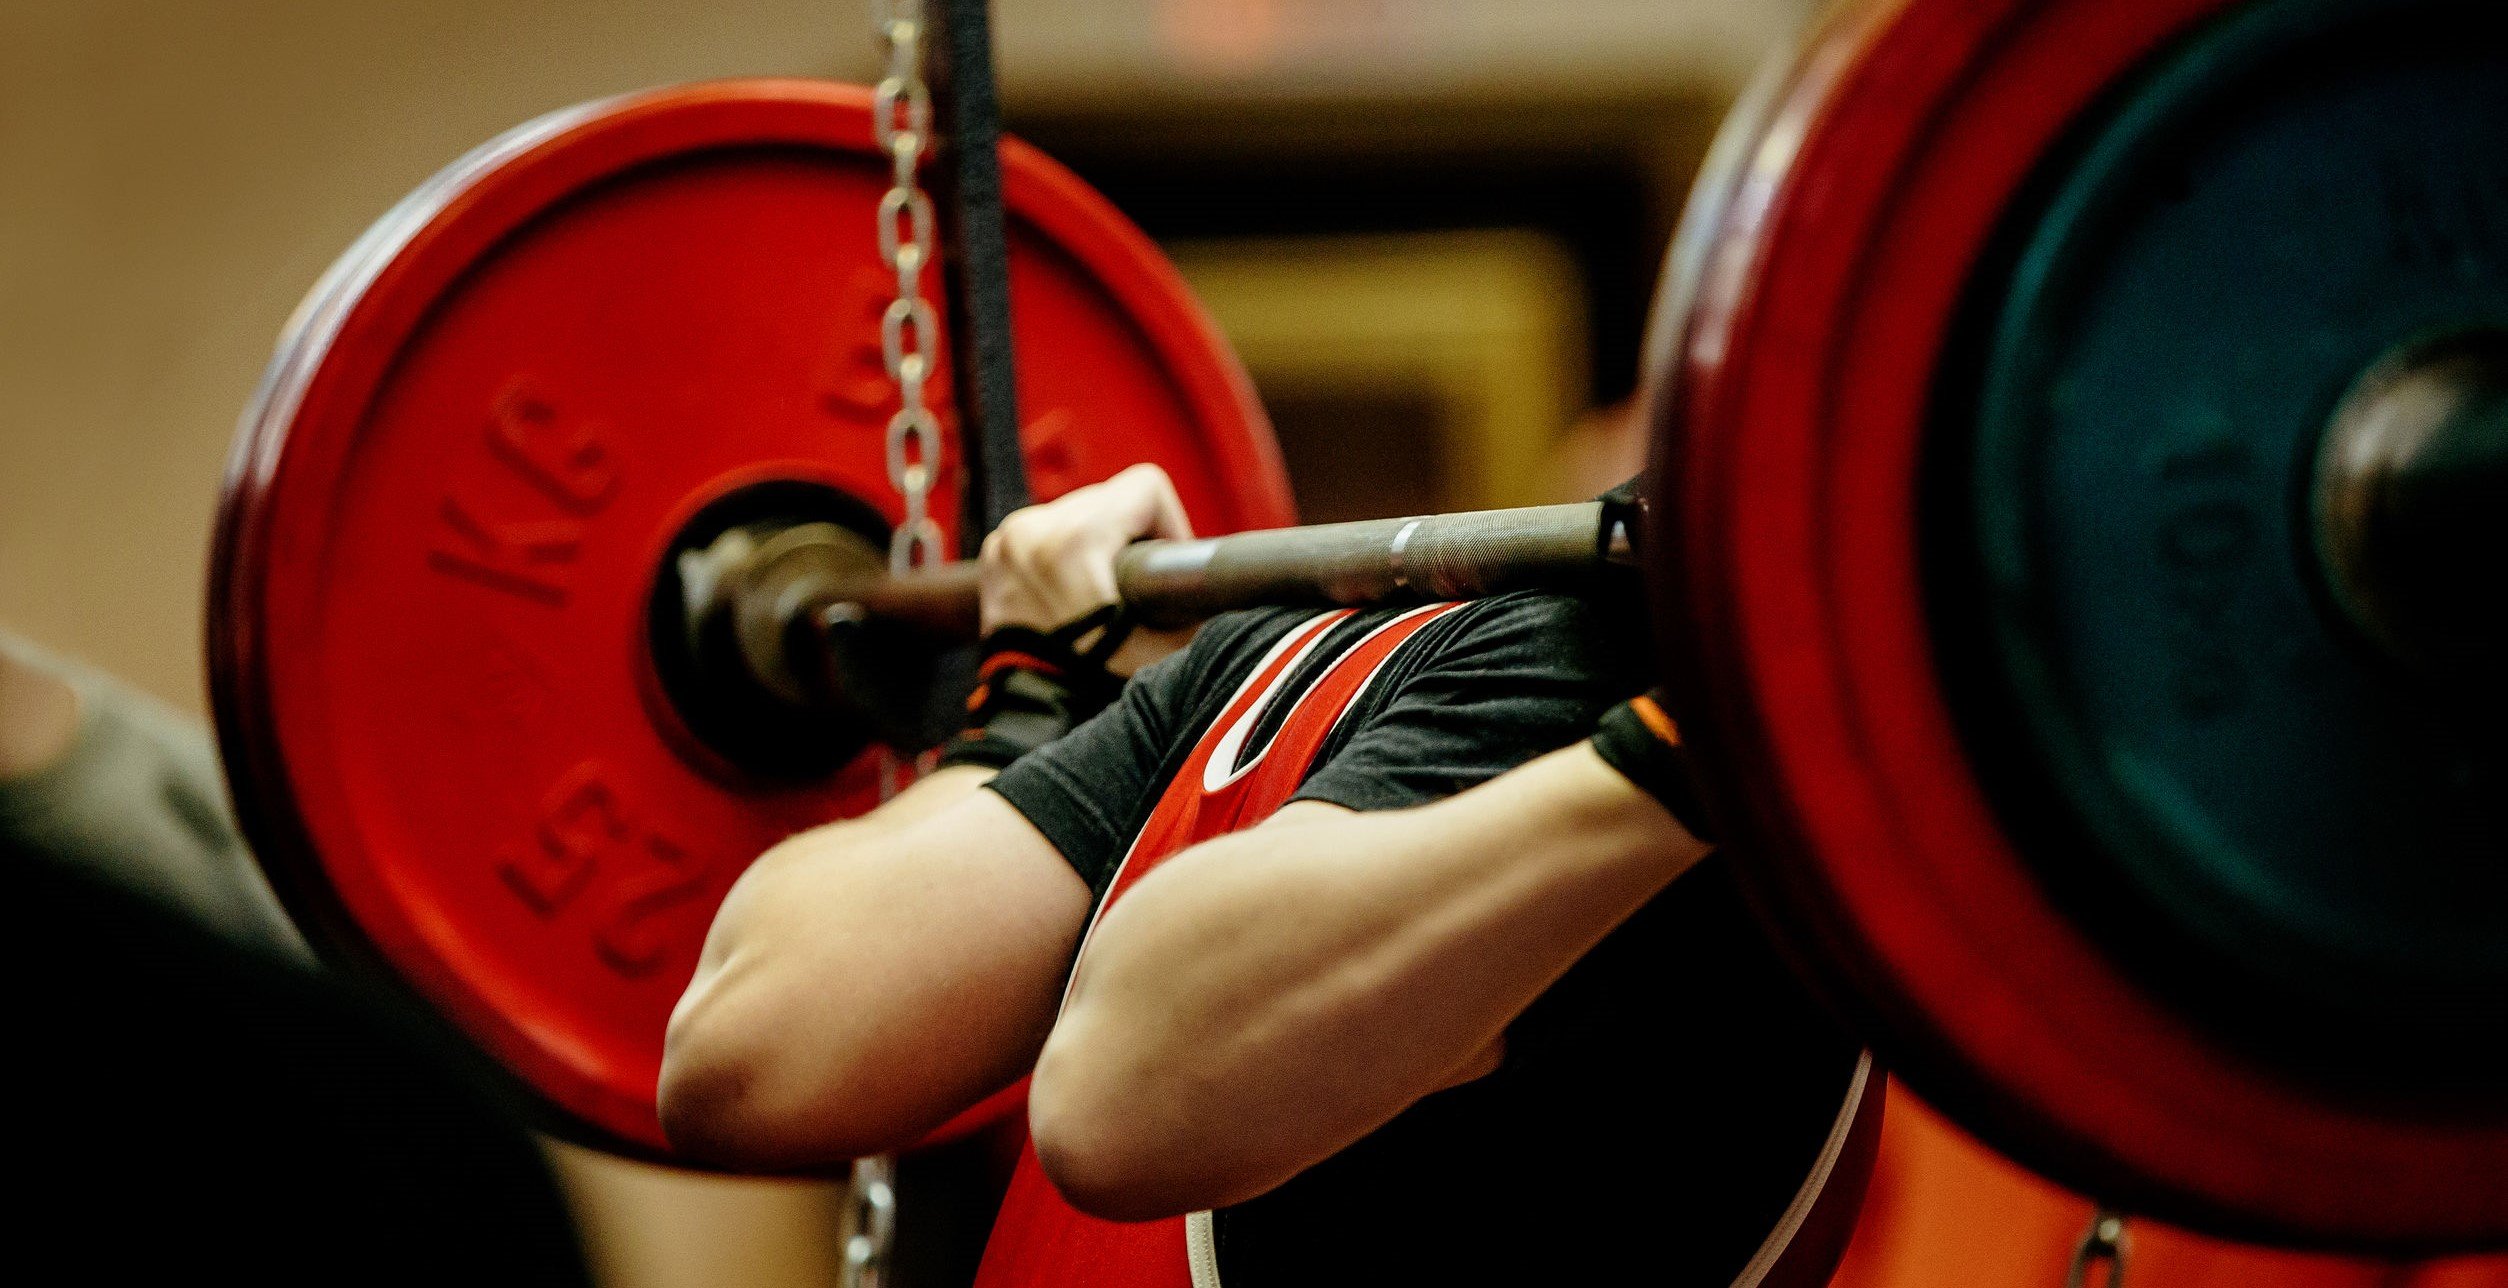
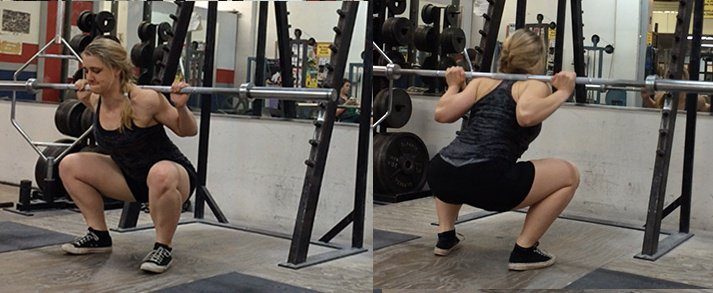
This is how we efficiently build muscle in the minimum amount of time. What are the exercises that we’re going to target? 1) The Push-Up: The best exercise you could ever do for yourself when it comes to using your bodyweight for push muscles (your chest, shoulders, and triceps): 2) The Bodyweight Squat: This exercise serves a dual purpose: it is the foundation for building strength AND helps build proper mobility. If you are going to ever do barbell squats, you need to work on hitting proper depth with a bodyweight squat first! 3) The Inverted Bodyweight Row: Until you can get your first pull-up or chin-up, these exercises are GREAT to start building your pull-muscle strength (your back, biceps, and forearms). 4) The Pull-Up and Chin-Up: Once you can support your body’s weight above the bar, the world becomes your playground. No strength training routine should be without pull-up or chin-up work! (Click here if you can’t do a pull-up or chin-up yet): And now we’re into the best weight training exercises: 5) The Barbell Squat: Probably the best exercise when it comes to building strength and muscle throughout your whole body. It also burns crazy calories and makes life better. This is a MUST:
6) The Barbell Deadlift: Maybe the best exercise of all time. Actually no, it IS the best exercise of all time. It’s certainly the most primal: “pick the weight up off the ground. Done.”
This is a very technical lift, so make sure you read our article on how to deadlift with proper form: 7) The Barbell Bench Press. Lie on a bench, squeeze your shoulder blades to keep your back tight, and then lower a barbell until it almost touches your chest. Pause, and then press it back up towards the sky. Repeat! And get strong. 8) Barbell Overhead Press: Stand with your feet about shoulder-width apart and lean back by pushing your hips forward. While keeping your entire body tight, press the bar overhead. Once the bar passes your forehead, move your body back under the bar by driving your torso forward and back into a standing position. At the top of the lift shrug your shoulders slightly and lock your elbows.
These are some of the best compound exercises you can complete in order to build muscle. Want more muscle? Great! Get stronger at these movements! One quick note: when I first started lifting, it took a while to build up the strength to be able to bench press or overhead press with the 45-lb bar. If your gym doesn’t have a lighter bar, dumbbells are a great option! Your mission, should you choose to accept it: Commit to trying ONE of these movements in the next week. Use 20 seconds of courage, recruit a friend who has lifted or trained before, and try your best. I have three options for you next:
5 Muscle Building Workout Routines For WomenI’m going to walk you through three different levels of strength training, and by the end of today, you’re going to know exactly how to get started. My advice: do 2-3 strength training routines per week, with 1-2 days off in between. As the saying goes: “muscle isn’t built in the gym, it’s built in the kitchen!” So your goal should be to do a strength training routine, and then make sure you eat a caloric surplus so that your body has enough calories to rebuild your muscles bigger and stronger! LEVEL 1: BODYWEIGHT TRAINING Here’s a beginner bodyweight training routine you can do in the comfort of your own home:
We also have a downloadable worksheet of this beginner’s workout that you can print out and hang on your fridge to track your progress! Get it when you sign up below:
Grab Your Beginner Bodyweight Routine Worksheet. No Gym Required!
LEVEL 2: DUMBBELL WORKOUT If you have dumbbells at home or access to a gym, you can pick our Level 4 workout from our 6-Level Gym Workout Routine. So your Dumbbell Workout is 3 circuits of the following:
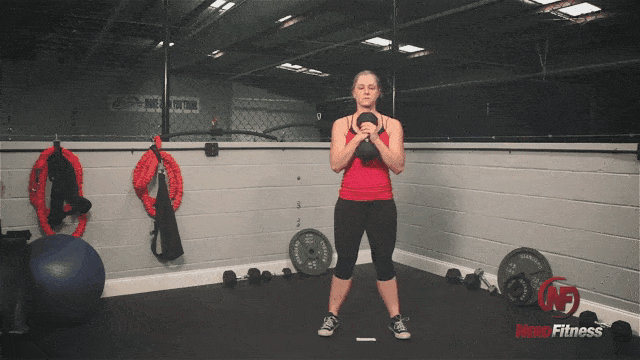
(By the way, these are two GREAT exercises towards getting your first pull-up) LEVEL 2: BEGINNER KETTLEBELL WORKOUT If you have a Kettlebell at home, here’s a 20-Minute Beginner Kettlebell Workout you can do: Do 3 circuits of this Kettlebell Workout:
If you like this Kettlebell workout and want to follow along on a worksheet, simply print out our Kettlebell Workout and bring it with you:
Grab Your Beginner Kettlebell Routine Worksheet!
LEVEL 3: BARBELL GYM WORKOUT Here’s a Barbell workout you can follow from our Level 5 Gym Workout Routine. BARBELL BATALLION WORKOUT A:
BARBELL BATALLION WORKOUT B:
PICK A WORKOUT, GET STARTED! The whole point is to do challenging movements that really make your muscles work, and then try to do ONE more rep, or lift a SLIGHTLY heavier weight next time! Don’t sweat the small details and instead use 20 seconds of courage to get started! Track your workouts by writing down what you did, and then do what you can next time. If you really want to level up quickly, LEARN HOW TO DO SQUATS AND HOW TO DO DEADLIFTS. These two exercises changed my life! “Staci, that’s still too many choices! Can you just tell me what workout routine to follow?” Okay fine! Here’s what I would do if I was you.
Still overwhelmed? Check out our coaching program. We get to learn your story, and then build a program and strategy around your goals that you CAN do. 10 Tips for building muscle as a WomanI interviewed multiple other coaches on our team and asked for their best advice on how to build muscle as a woman. Here’s what they said: Susy (Coach, BS in Psychology, Certificate III & IV in Fitness, 5+ years of experience) Tip #1: Food is your friend when you are looking to build muscle and get stronger – your body will need fuel, so you may need to eat more on the days that you work out! Tip #2: Strength and muscle building requires structure to your workouts – you progress through getting better at specific movements, so make sure that you enjoy the style and structure of your workouts so that you can be as consistent as possible. Tip #3: Your progress will always be fastest if you avoid injury, so correct form and listening to your body is super important. Your muscles will fatigue and feel sore, but joint pain and sharp, stabby pain means something isn’t moving quite right. Kerry (Coach, NASM-CPT, 6+ years of experience) Tip #4: Fall in love with the process. Getting stronger is a journey, one that is both rewarding and challenging. So no matter where you are starting from, take the time to celebrate each small step along the way towards a more badass version of yourself! Christy (Coach, BS in Applied Health/Fitness, National Personal Training Institute Graduate, Precision Nutrition Certification, 6+ years of experience) Tip #5: To get strong, you gotta lift weights. When lifting weights to get strong, you gotta be okay with testing your boundaries every now and then. After exercising with your current weight, for the next training session…stop…and try a few reps with the next weight UP to test it out! It might surprise you how much more weight you can lift! Here are some other tips to help you build muscle. Tip #6: Boost your testosterone naturally: Consume enough saturated and monounsaturated fats, keep your sugar intake low, and make sure you’re getting enough Vitamin D and Zinc. These are items linked with boosting your testosterone naturally.[12] Speaking of testosterone – I know you may think of this as a “male” hormone, but it plays a huge part in women muscle building,[13] fat loss,[14] increase bone mass,[15] and many other health-related issues[16](remember: estrogen is made from testosterone). Men make about ten to fifteen times what we make naturally,[17] but it doesn’t mean we don’t need it too. Another way we can help our testosterone levels is to watch our cortisol levels. Cortisol is a hormone that is promoted by stress and reduces free testosterone levels (in addition to signaling for your body to store fat).[18] Want a way to naturally lower your cortisol levels? Try meditation.[19] Tip #7: Not getting bigger? Eat more food. Focus on more fats and carbs. They are the easiest ways to increase your total calories. You can check out our Guide to Build Muscle for more specific tips on how to eat more food. Tip #8: Make sure every meal has a solid protein source. Protein is needed for building muscle, so prioritize this above all else when you sit down to eat. Having trouble getting it all down? Buy a blender! Steve drinks two smoothies a day to reach his protein goals and you can check out our Guide to Protein Shakes for his personal recipe. On the go with no blender? I like to keep protein powder with me in a small Ziploc bag – that way I can grab a bottle of water, rip off the corner of the Ziploc bag, and use that as a funnel to get the powder into the water bottle. Then, just replace the cap and shake and you’ve got a protein-filled snack! Tip #9: Get more sleep! When you build muscle, your body is working overtime, burning extra calories. It’s going to need some time to recover. Remember, muscle is built when you rest, not when you actually lift. Go to bed! Tip #10: Start today! Gaining muscle comes down to eating right and strength training. Let’s get you lifting today! Try some push-ups and squats as we discussed in our strength training section. Tomorrow we can work on eating right and lifting more. The most important step you can take today is to begin. Let’s give you some more tips to get you going. Building Muscle: Next Steps!If I can narrow down building muscle for women, it would be three main points:
That’s it. You can do this. 
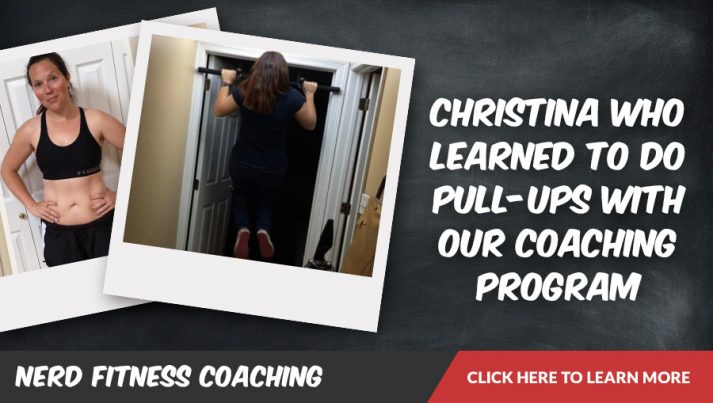
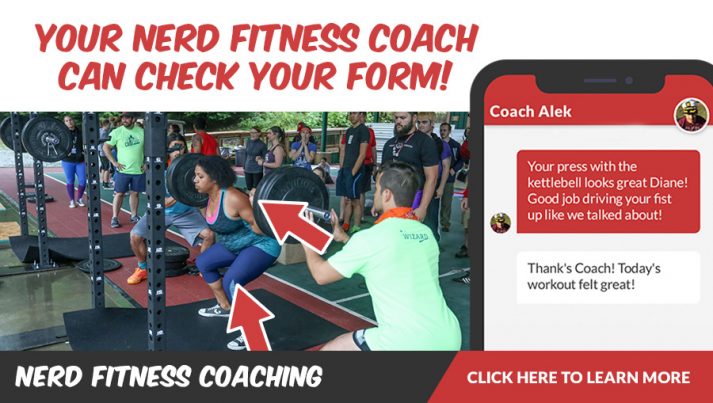
If you made it this far, and you want more specific instruction and guidance, we have a few options for you: 1) If you are somebody that wants to follow a tailor-made program designed around their life and goals, check out our popular 1-on-1 Online Coaching Program. You’ll work with our certified NF instructors who will get to know you better than you know yourself, check your form, and program your workouts and nutrition for you. 2) If you want an exact blueprint for growing strong, check out NF Journey. Our fun habit-building app helps you exercise more frequently, eat healthier, and level up your life (literally). Try your free trial right here: 3) Join the Rebellion! We need good people like you in our community, the Nerd Fitness Rebellion. Sign up in the box below to enlist and get our guide, Strength Training 101: Everything You Need to Know. It’ll help you begin your journey on building muscle.
Download our comprehensive guide STRENGTH TRAINING 101!
Lastly, I’d love to hear from you! PLEASE leave your questions, eating or strength or otherwise below so we can answer them and become best friends and practice karate kicks in the garage: How can I help you get bigger and stronger? What part of this journey are you still struggling the most with? What are your favorite bulking up foods!? Share with your friends in the comments so we can all go buy it in bulk at Costco. -Staci PS: Make sure you check out the rest of our Strength Building Articles!
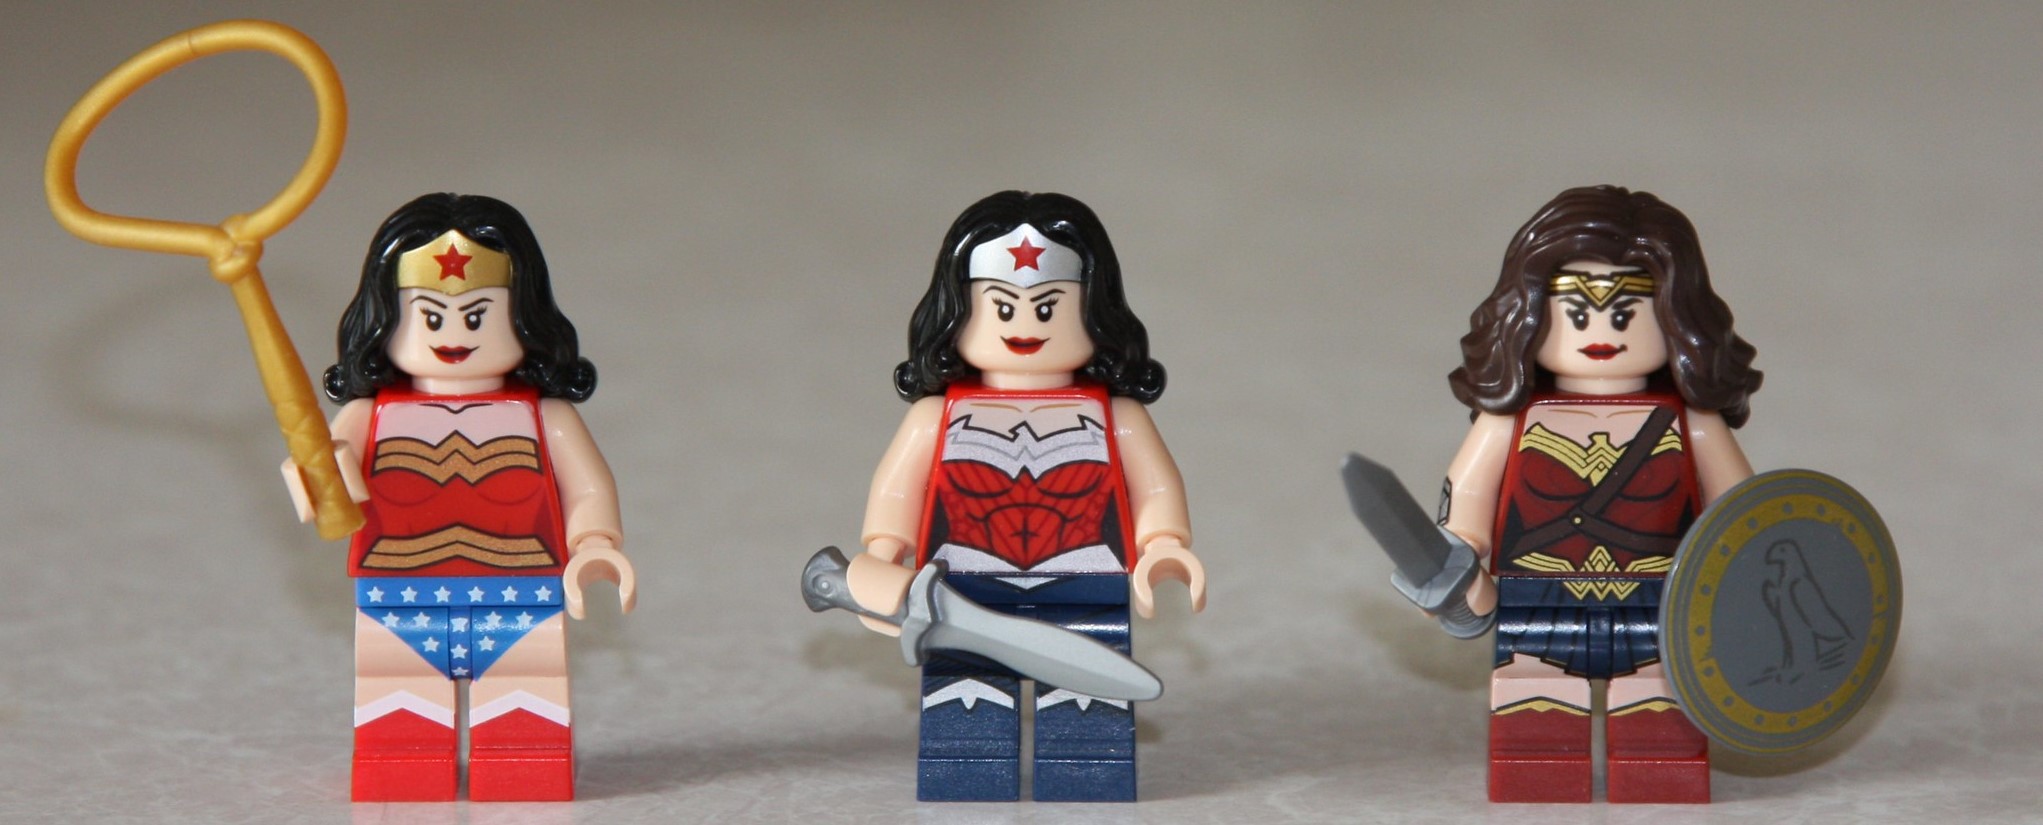
### Photo sources: Women’s Day 2015, Sea spray, The Viking, The Evolution of LEGO Wonder Woman, Apocalyptic Motorcycle, Person Mountain,
Footnotes ( returns to text)
via https://www.nerdfitness.com/blog/how-to-build-muscle-as-a-woman-the-ultimate-guide-for-gaining-weight-the-right-way/ Deadlift day is my favorite day of the week. After reading This Ultimate Guide to Deadlifts – a part of our Strength 101 series – it’ll be yours too! Click any link below or scroll down to read the whole guide:
Teaching people how to deadlift and get comfortable with barbell training is one of my favorite things about our 1-on-1 online coaching program. We do video form checks via our coaching app, we’ll build a program that fits your schedule, and even help you get your nutrition dialed in too. If that sounds like something you’d be interested in… Oh, and if you like this guide, we have an entire Strength 101 Guide that you can download free when you join the Rebellion (our free community). I’ll send you the ebook when you sign up in the box below!
Download our comprehensive guide STRENGTH TRAINING 101!
Let’s do this.
What Are the Benefits of the Deadlift?
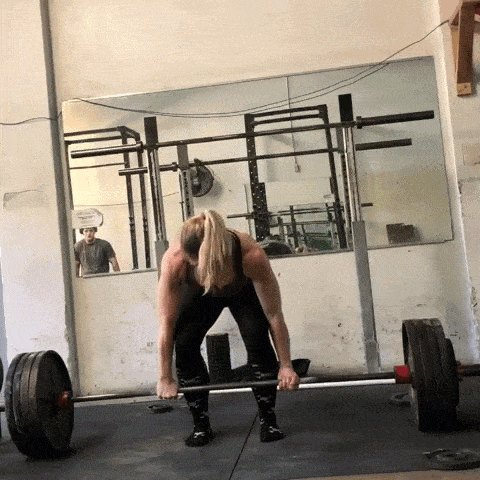
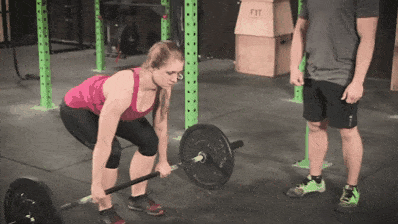
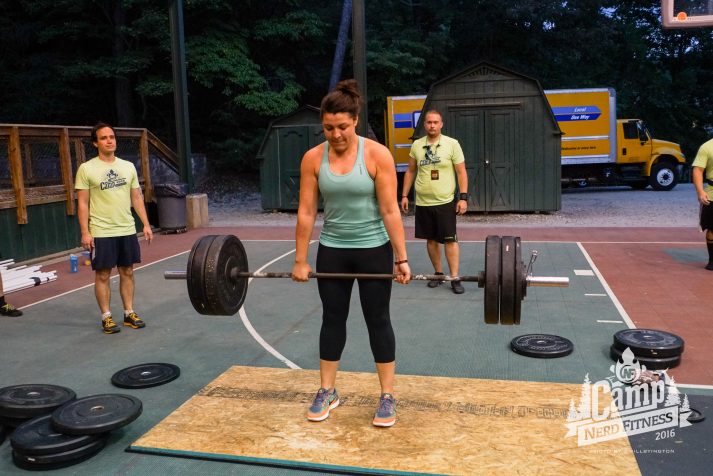
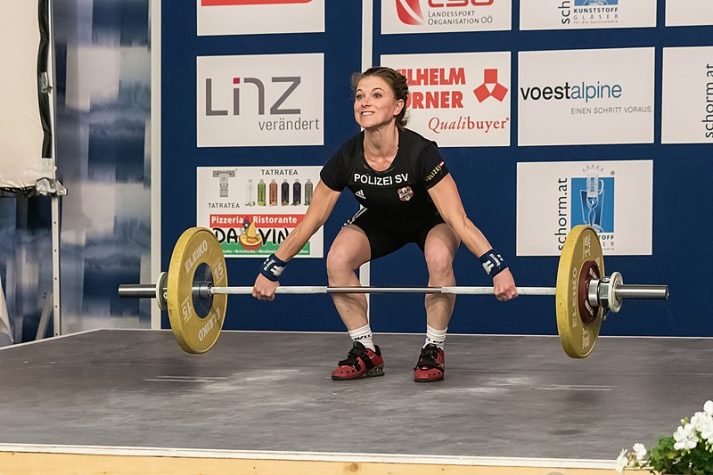
The deadlift is a true full body movement. While most people would consider it a “back” exercise, others will argue that it’s a “leg” exercise. In my book, it’s an everything exercise. And who am I? I’m Staci Ardison. I love the Legend of Zelda. This is me deadlifting 455 lbs (206 kg) at a bodyweight of 150 lbs (68 kg): Back in 2011, I could barely lift a pink dumbbell. But then I fell in love with heavy barbell training and the deadlift changed my life: I’m now a regular powerlifting competitor and a Senior Coach for the NF coaching program, where I help people like you hit their strength training goals. I’ve written this guide on Deadlifts because it’s the exercise that will change your life too. So why is the deadlift so great? Well, when you deadlift you use every single muscle in your body:
Whenever anyone asks me where I got my shoulders/abs/etc, I answer the same: deadlifts. 
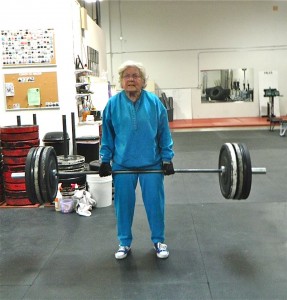
Why do a million crunches when I can just do deadlifts instead? Way more fun! Plus, deadlifting is actually more effective at building a strong core. On top of that, the deadlift is a basic human movement. Other than the squat, there might not be another movement that is more “functional.” From the grocery store, to moving a piece of furniture, to picking your child up off the floor – you are deadlifting. As you build solid form deadlifting in the gym, your form for picking things up in real life will also improve. This means you’ll be less likely to injure yourself now and later down the line (not only because you are stronger, but because your body knows how to properly handle the weight). And this goes further than just picking up objects – how you move while shoveling snow, doing yard work, and doing other basic everyday life tasks will all dramatically improve from deadlifting. Don’t be that guy/gal with back problems from lifting that random object! Oh, and by the way, the effectiveness of the deadlift isn’t limited to an age or gender – even grandma thinks they’re cool. The deadlift is awesome – perhaps the purest measure of strength: either you can pick the weight off of the ground, or you can’t. What Is Proper Deadlift Form? How to Deadlift Safely
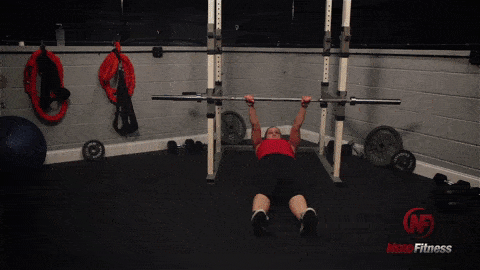
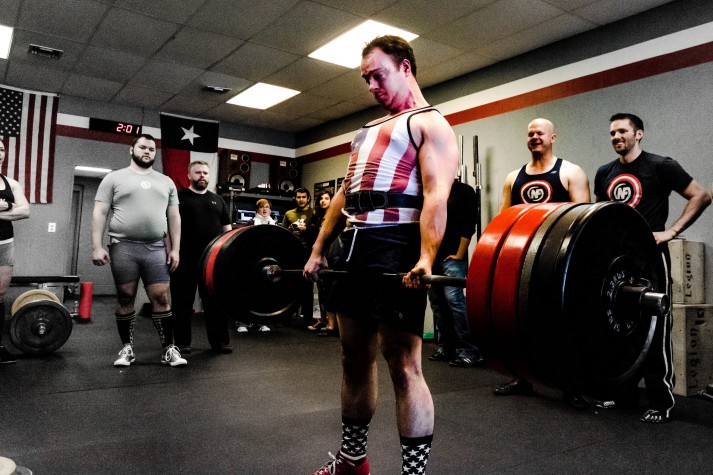
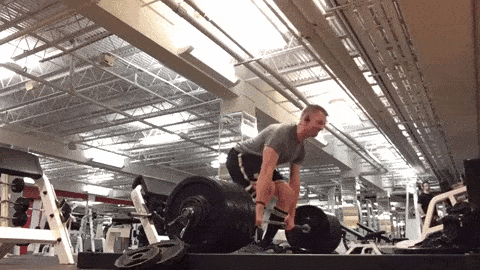
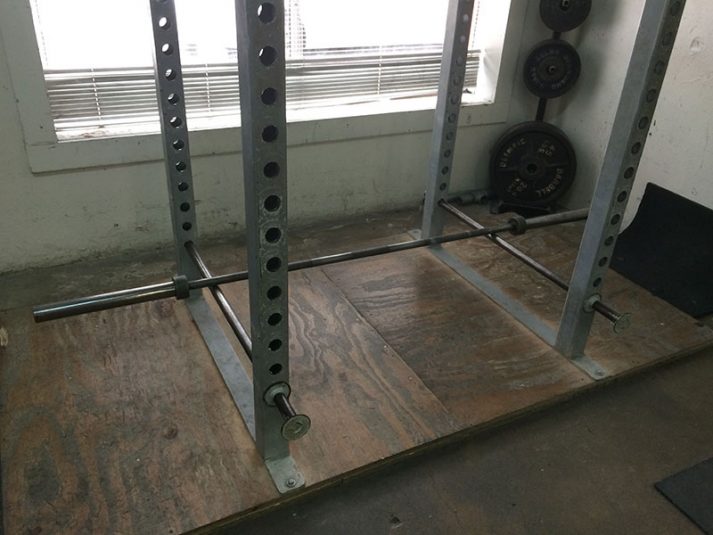
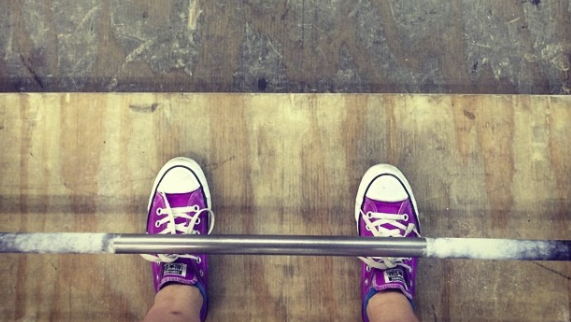
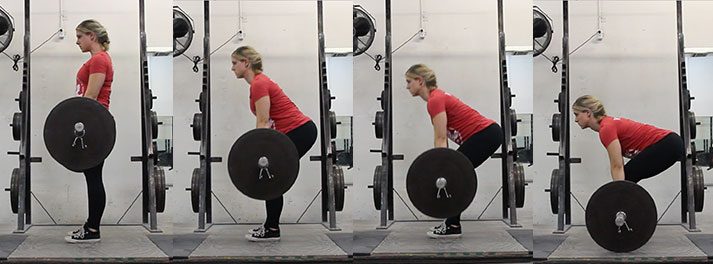
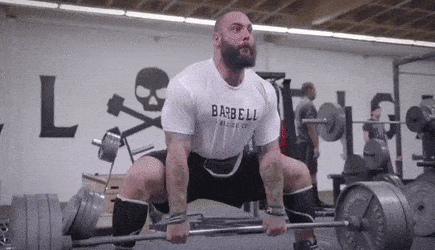
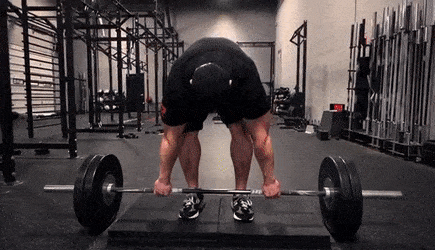
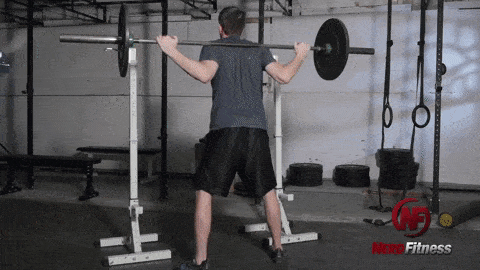
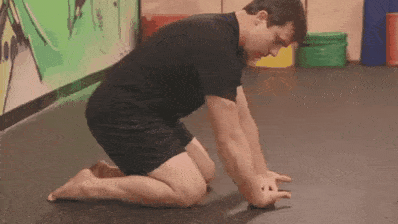
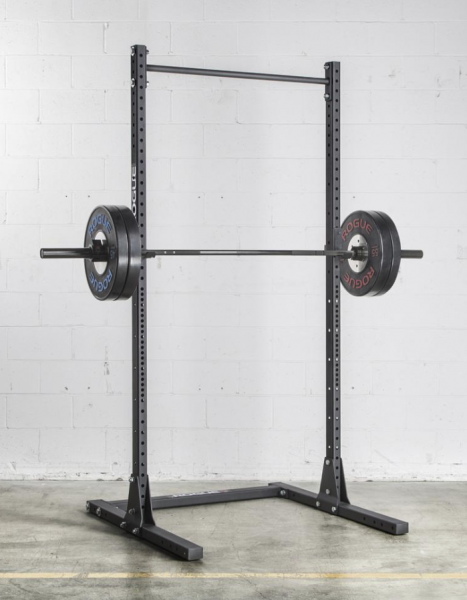
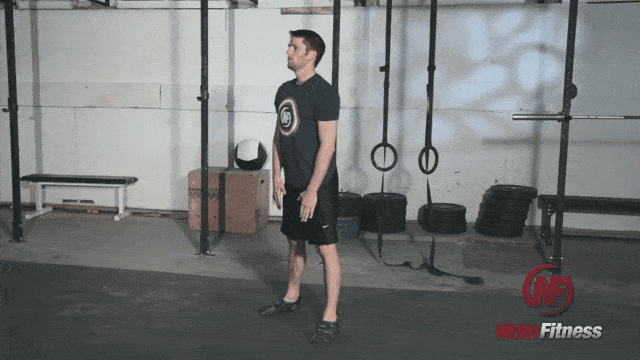
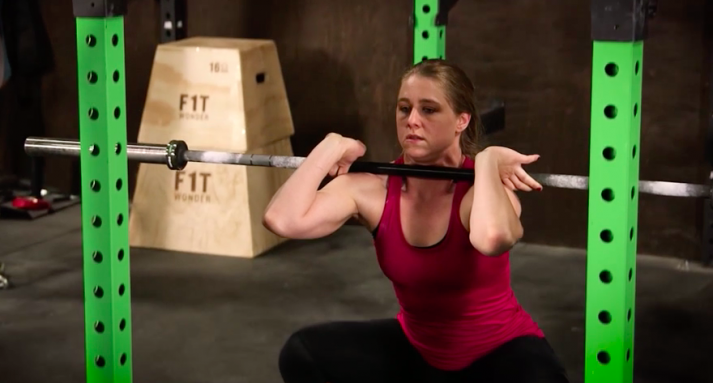
When doing a deadlift you’ll be lifting a dead weight off the ground (hence the name, duh). The deadlift can actually be taught in one sentence: “Bend your knees and bend over with a flat back to pick up a loaded barbell off the ground.” It looks like this (this is Team NF’s Steve pulling 420 pounds): Of course, this sentence doesn’t do the awesomeness of this exercise justice. Here’s how to do a conventional barbell deadlift:
(Don’t worry I’ll get more in-depth below.) Oh, what’s that? You want even MORE detail on each of those steps!? Sure. PHASE ONE: The Deadlift Setup. *NOTE: Always warm up properly, and start with just the bar, even for deadlifts!
PHASE TWO: Preparing to lift the bar! Here are the next steps to take before lifting the bar off the ground (I’ll petition Websters to add the word “deadliftoff” to the dictionary):
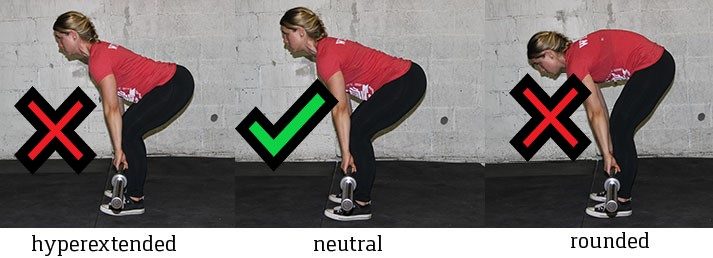
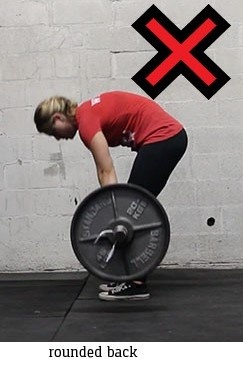
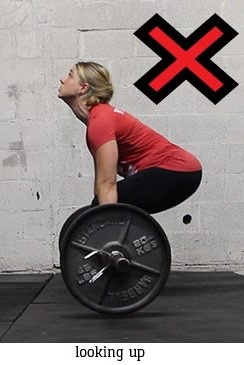
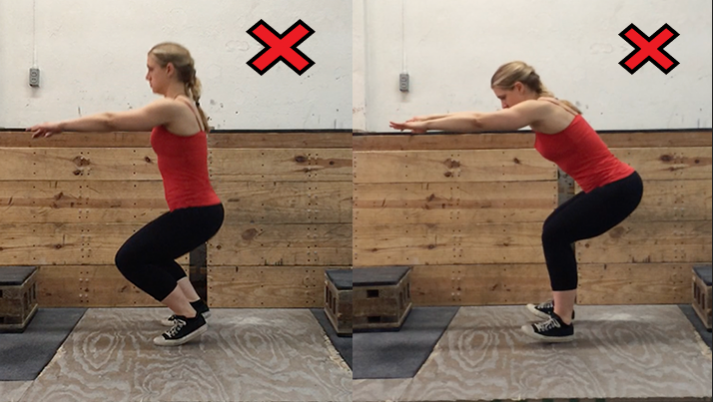
This is the final starting position of the deadlift: everything is tight and in position and you’re ready to pull. To Recap we DON’T want your back to round or hyperextend. If you’re just starting out, getting into a neutral spine might feel like you’ve gone too far (hyperextended), so don’t be afraid to ask a friend for help or to record yourself so you can see what you’re doing. We also do form checks with our 1-on-1 coaching clients for stuff just like this. PHASE THREE: Deadlifting with proper form (THE DEADLIFTOFF!) 
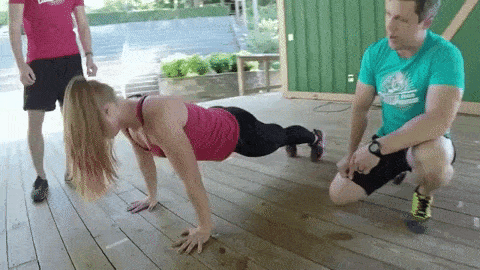
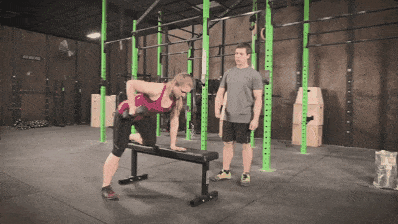
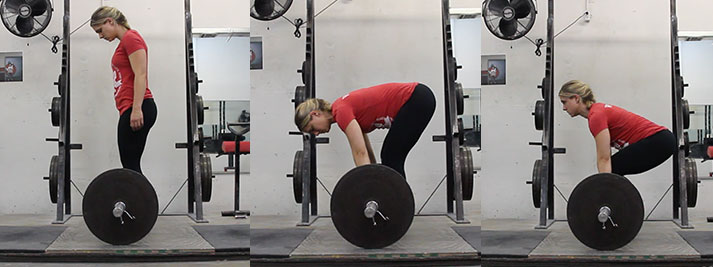
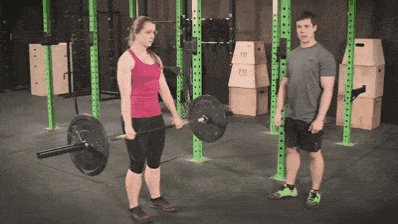
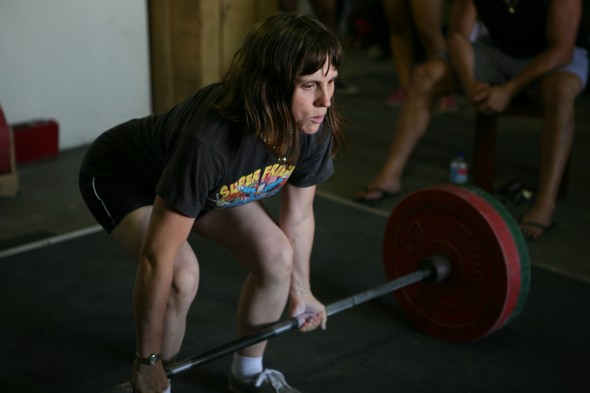
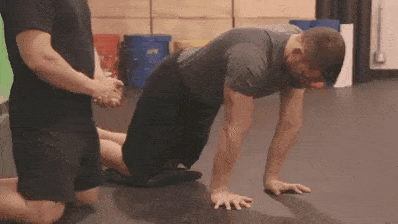
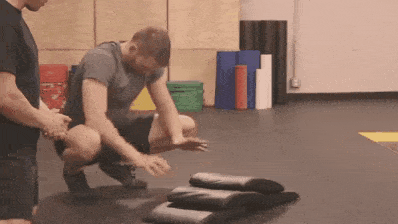
If your setup looks and feels good, you’re ready to lift. Here is the Conventional Deadlift, as demonstrated by me (Staci) and Jim from the NF Coaching Program: Here are those steps in written form. Inhale and fill up space deep in your stomach (like a deep belly breath), and while keeping your entire back, butt, and core tight with your chest puffed out, drive down through your heels and the bar should lift off the ground:
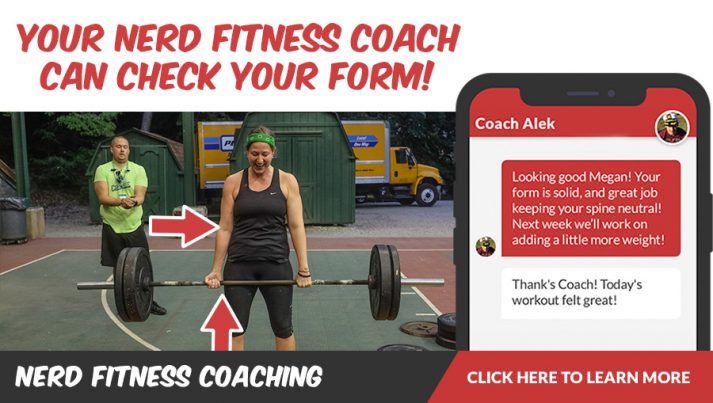
I realize that’s a lot to take in, and that’s okay! You’ve read this far and I’m proud of you. Many people are so afraid of the deadlift and avoid it at all costs because they’re afraid of splitting themselves in half or getting injured in another way. That’s why we not only created this awesome guide on deadlifts, but also a way to review technique and proper movement so you have the confidence you’re doing it correctly. If you want an expert to check your deadlift form and help build a workout program specific to your goals, check out our 1-on-1 Online Coaching Program. Our coaching app lets you record and send a video of your movement directly to your coach who will provide specific feedback: Setting the Bar Down (Should I drop the bar on a Deadlift?)
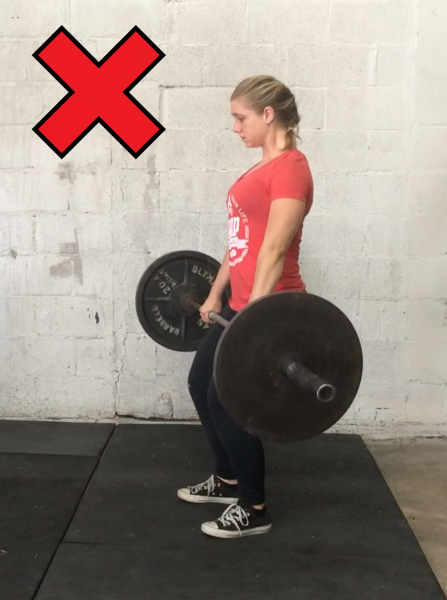
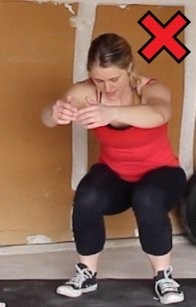
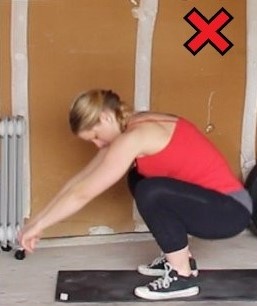
Okay! You got the weight off the ground and finished the movement. But now what!? Your body should descend all at the same time, just as it ascended during the deadlift, only in reverse! Unlock your hips and slowly move your hips backward until the bar lowers past your knees, then bend your knees and slowly lower the bar to set it down (make sure you unlock them at the same time. Don’t unlock your knees first, as it will cause a lot of awkward movement, and possibly your lower back to round). I REPEAT: DO NOT DO THIS: Don’t lose tightness until you let go of the bar. This is extremely important – a large amount of deadlift injuries come from people getting super excited about making a lift, losing tightness, and then putting the bar down wrong. You want this to be a quick movement – lowering the deadlift slow will take a lot out of you and leave you sore for days. Should you drop the bar during the deadlift? The eccentric part of the deadlift (lowering it) is actually riskier than the concentric (picking it up) part of the deadlift. Many coaches will advocate dropping your deadlift (especially with advanced athletes where they can’t afford to sacrifice performance later in the week). In our opinion, especially if you’re training in a commercial gym, I would recommend putting the bar down (especially if you want to compete in powerlifting competitions – the lift does not count if you drop it). So, practice putting the bar down properly. It’s just as important as practicing picking it up. By the way, we have a massive Strength 101 Guide that you can download free when you join the Rebellion (our free community). Get the guide when you sign up in the box below!
Download our comprehensive guide STRENGTH TRAINING 101!
Proper Deadlift Grip, Straps, and other Equipment
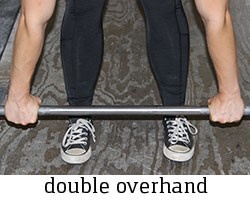
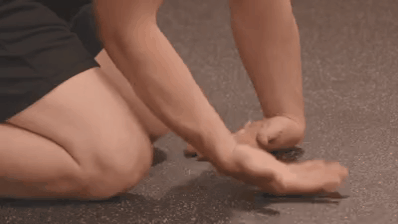
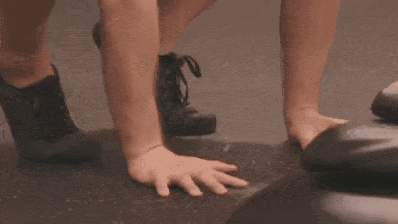
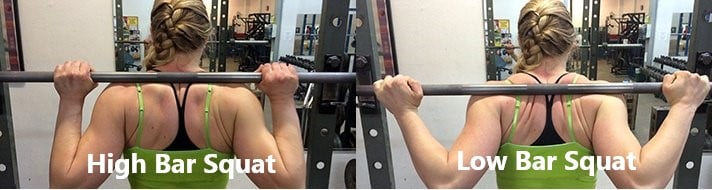
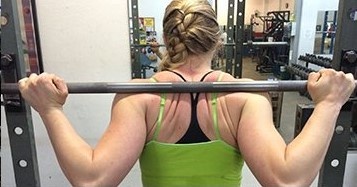
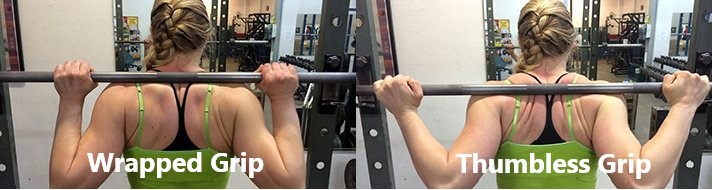
Grip strength is a huge part of the deadlift. If you can’t hold on to the bar, you can’t lift it! Here’s how to improve your grip strength quickly. There are two main grips when it comes to the deadlift. #1) Double overhand grip. Your palms are both facing towards your body. This is the safest grip, and the best grip for beginners to start with. #2) Mixed Grip: One hand grabs the bar with an overhand grip, and another hand grabs the bar with an underhand grip. The mixed grip has many disadvantages:
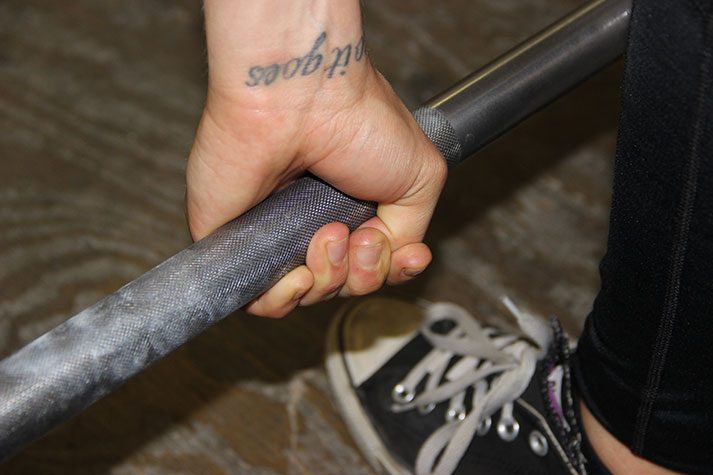
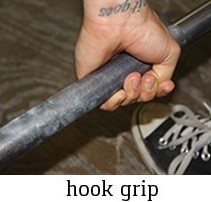
So why do a mixed grip? You can physically lift more. The bar wants to roll out of your hands, so by using a mixed grip you are more likely to not have your grip fail you on a heavy lift. As you start to lift more than your grip can handle, you can consider doing a mixed grip for your heaviest lifts, but be sure to use the double-overhand throughout your warm-up sets. Consider doing grip strength work as well. #3) Hook grip: This grip is where you put your thumbs under your fingers. 
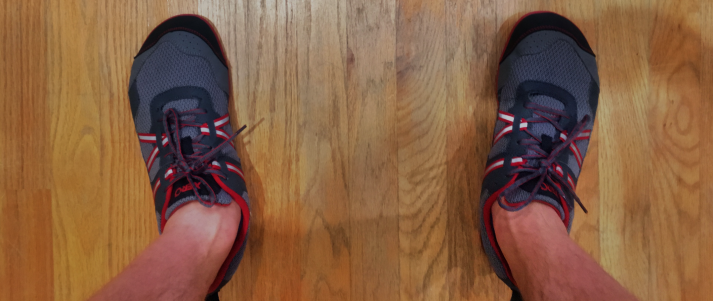
This type of grip is preferable to the mixed grip due to the fact that it doesn’t introduce any imbalances. However, it does have one major disadvantage: It hurts like hell! From personal experience, you get used to it and your thumbs can manage, but prepare for pain when you learn to do the hook grip! No matter what grip you use, you’re probably going to want to invest in some chalk! It’s absolutely optional and initially won’t be incredibly useful. However, after you start to put some weight on the bar, chalk will be enormously helpful for hanging on to the bar (I use this kind of lifting chalk). I certainly find this to be a better, smarter, and safer option than either straps or gloves. Speaking of which… Here are some common questions on deadlift equipment: #1) “Should I use straps while doing deadlifts?” Ehhh, probably not. Straps can help you lift more than your hands can hold with an overhand grip, but relying on straps could cause your grip strength to be undeveloped down the road. You’re better off developing your grip strength alongside your deadlifts. Short answer: consider using straps strategically when doing high volume deadlifts, but don’t rely on regularly them for max lifts: improve your grip strength. Instead, chalk, stronger grip strength, and a hook grip for max lifts is your friend! #2) “Should I wear gloves while doing a deadlift, Staci?” Nope. Gloves actually create space between your hands and the bar, and it reduces your grip security, increases the diameter of the bar, and makes the bar harder to hold on to. This means the gloves are doing the exact OPPOSITE of what you think they’re doing. Use chalk instead, my friend. I don’t recommend using gloves unless you have an injury like a ripped callus. Speaking of ripped calluses, or if you’re worried about getting rough hands from deadlifting – make sure to take care of your hands and they are less likely to happen! #3) “Do I need to use a lifting belt?” When starting out, you don’t have to worry about using a belt. However, as you get to really heavy weights, it may be something to look into. Belts need to be worn correctly in order to be effective. Note: While you may be able to lift more using a mixed grip and a belt, they’re definitely not necessary to lift heavy. Here’s a video of Anthony Mychal deadlifting 550 lbs at the powerlifting competition at Camp Nerd Fitness – double overhand with no belt: #4) “What kind of shoes should I wear to deadlift?” GREAT question. I don’t care what kind of shoes they are, as long as they are flat. You really have four options for deadlifting shoes:
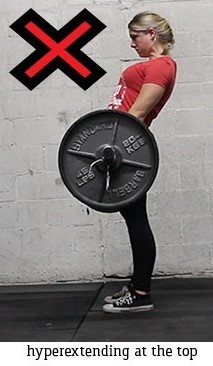
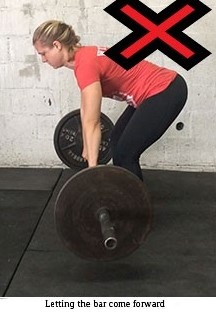
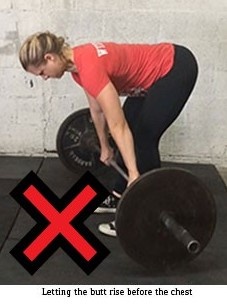
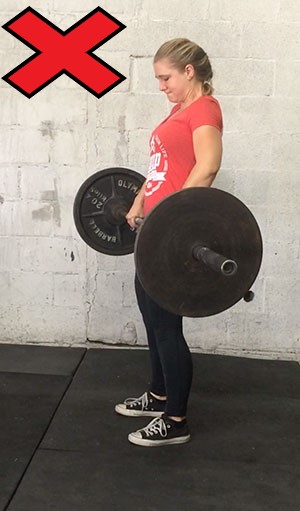
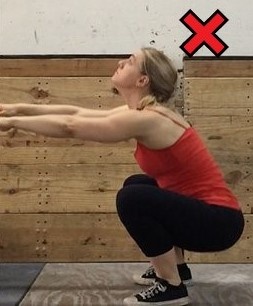
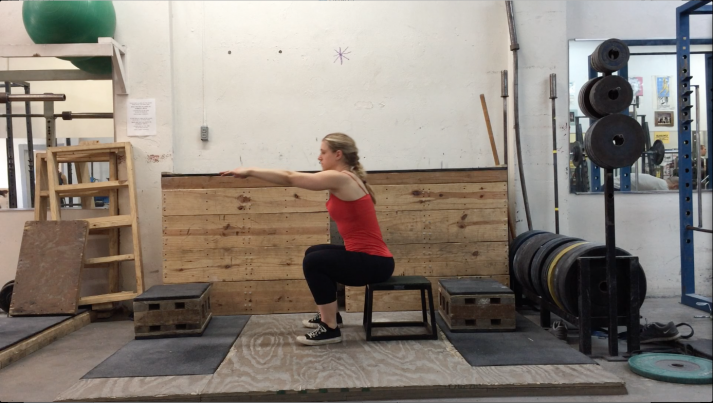
Still here, eh? Amazing! We want to be part of a community that helps you reach your goals. Whether you want to deadlift for the first time, or you’re trying to hit the 1,000 club, our Nerdy Coaches want to help. Let us take care of everything so all you have to worry about is following the instructions and picking up the weight! 7 Common Faults and Mistakes while DeadliftingDON’T DO THESE THINGS: #1) Rounded Back – not keeping your spine in neutral the entire time. Letting your lower back round at all is a huge no no. [2] #2) Looking up (with your neck) – Along with keeping a neutral spine, hyper extending your neck to look up is also something we want to stay away from. #3) Hyperextending at the end of the movement – The spine should still be in neutral even at the top. Hyper extending at the top is actually not something we actually strive for or need to do. #4) Treating the deadlift like a squat with the bar in your hands. You are not starting in a squat position and standing up – it is a different movement. #5) Letting the bar come forward – The bar needs to stay over your midline and be dragged up your body the entire lift – any movement forward of your midline should be avoided. #6) Butt rises faster than your chest (also known as the “stripper deadlift”) – your chest should lead the movement, and your entire body should move upward at the same pace. #7) Bending your arms – your arms should stay straight. Don’t bend your elbows to try to get the bar up faster. NOT SURE YOUR FORM IS RIGHT? I hear you – Personally, I deadlifted with bad form for years and I didn’t even realize it. It wasn’t until I enlisted the help of an online coach who checked my form via video and helped me with the right “mental cues” to get me to start deadlifting correctly. If you want somebody to check your form – AND build the workout for you – consider our 1-on-1 online coaching program with form check: What Are the Different Types of Deadlifts?So far we’ve addressed the conventional/traditional barbell deadlift. There are MANY different variations of deadlifts, and you can use whichever one floats your boat (if you have a boat to float, that is). Here are 8 different deadlift variations: 1) Conventional Deadlift – Your hands are just outside your feet, standing at about hip-width apart. Our article has been highlighting this form of deadlift. 2) Sumo Deadlift – Your hands are inside your feet with a wider stance. 3) Hex or Trap Bar Bar Deadlifts – Use a specialty bar made just for deadlifting which changes the biomechanics. 4) Snatch Grip Deadlift – Your hands will use a wide grip like in the Snatch. 5) Romanian Deadlift: Think of this as the top half of a conventional deadlift (imagine you’re a “drinking bird” bending over at the waist).
6) Deficit Deadlift: This movement increases the range of motion of your deadlift, since your feet are elevated compared to the bar.
7) Rack Pulls: Conversely, this decreases your range of motion with the deadlift, since the bar is raised higher.
8) Dumbbell Deadlift Variations: For either accessory work, or if you don’t have access to a barbell and weights. This guide covered primarily the conventional deadlift, because it’s a great variation for beginners and an exercise you can do every week for the rest of your life. Once you get comfy with it though, move onto others. Need more tips for strength training moves? I would highly recommend you do 3 things:
Oh and don’t forget to grab our Strength Training 101: Everything You Need to Know when you sign up in the box below:
Download our comprehensive guide STRENGTH TRAINING 101!
Frequently Asked Questions on the Deadlift#1) “What do I do if I can’t get into the proper starting position?” While you are getting the mobility to get into the correct starting position, you can put the bar on blocks to raise it up a few inches to help you get in the right position. Each workout, start with the bar a little lower, until it is just on the floor. #2) “What weight do I start deadlifting with?” Always start with just the bar. Then progress as described in our Strength Training 101 article “How Much Weight Should I Be Lifting?” Each week, your goal should be to lift SLIGHTLY more than last week. That’s it. By going SLOWLY, you’re giving all of your muscles, joints, tendons, your grip, and your central nervous system a chance to level up together. So start small. Lift more each week. #3) “Should I do ‘touch and go’ or ‘dead stop’ if I’m doing a set of multiple reps?” A dead stop means letting the weight settle completely on the ground before doing the next rep, while “touch and go” reps means you’re essentially bouncing the weight at the bottom of the movement and going RIGHT into the next rep. Touch and go reps are thus easier:
HOWEVER, while “touch and go” reps are easier, they are also more dangerous. It’s easier to mess up your form if you aren’t resetting every rep and easier to get fatigued. It is also in the eccentric (lowering) part of the “touch and go” deadlifts that most people get hurt. This is one of the most technically demanding, important lifts out there and should be treated with respect. For that reason, resetting between every rep is preferred for general strength programs. This allows you to reset, get your form right, and get your breathing right on every rep. Yes, If you are doing a CrossFit WOD, you might be doing touch and go for time. Awesome. You do you, boo. #4) “Okay, I get it. Deadlifts are great! How often should I deadlift?” I love your enthusiasm and I would never ask you to curb it, but there are some things we need to take into consideration when adding deadlifts into our program. (Here’s how you can build your own workout routine, by the way.) Heavy deadlifts are extremely taxing on the central nervous system. This means your body needs more time to recover. In fact, it’s so taxing that some coaches recommend taking the deadlift out completely for their more advanced, sport specific athletes. Most good strength programs only deadlift once a week – and it’s lighter volume than with your squats. Both Starting Strength and StrongLifts only include ONE set of 5 deadlifts. Meanwhile, they program 5 sets of 5 for squats. In our Coaching Program, we add deadlifts into each person’s workout on a case-by-case basis. Generally, it’s once per week, and we’d love to help build a program for you that has you deadlifting 400+ pounds in no time!* *Okay it’ll definitely take longer than “no time,” but it might happen sooner than you think! Get Out There and Deadlift: Next StepsI am so excited for you to start deadlifting, because it’s the ultimate physical AND mental exercise. For people looking for the next step, we’ve built 3 options that might float your boat: 1) If you are somebody that wants to follow a tailor-made program designed around their life and goals, check out our popular 1-on-1 Online Coaching Program. You’ll work with our certified NF instructors who will get to know you better than you know yourself, check your form, and program your workouts and nutrition for you. 2) If you want a snazzy app to teach you exactly how to start crushing deadlifts (using things you might have around the house), check out NF Journey. Our fun habit-building app helps you exercise more frequently, eat healthier, and level up your life (literally). Try your free trial right here: 3) Download our free Strength 101 Guide, which you can get when you sign up in the box below:
Download our comprehensive guide STRENGTH TRAINING 101!
So, as Mark Rippetoe, Starting Strength author said: “The deadlift also serves as a way to train the mind to do things that are hard.” If you can pick up hundreds of pounds off the ground, what else can you accomplish? I have a big question for you:
Note: these are the only two acceptable answers ? If you have more questions about how to fit deadlifts into your workout, please leave them in the comments below. Big or small, what questions do you have on the deadlift? -Staci PS: Here are our other free articles in the Strength 101 series:
### photo/media source:[3]
Footnotes ( returns to text)
via https://www.nerdfitness.com/blog/strength-training-101-the-deadlift/ Want to build muscle like this guy? (Leopard print unitard optional but encouraged) In this guide, we’ll provide step by step instruction that will help you start building muscle immediately! Like, today! We’ll explore:
That may seem like a lot of topics to cover. DON’T PANIC! Because gaining muscle and strength really comes down to three things. If you’re looking to start building muscle, getting bigger, and becoming stronger, these are the things you need to do:
I realize doing those three things is much easier said than done – I struggled with progress for a decade and know exactly what you’re going through if you’re feeling unsure. You probably don’t have years to make the mistakes that I did, and you just want to start getting results today. In addition to the free resources below, we also offer 1-on-1 Online Coaching, where you’ll get personalized instruction for your body type and goals, and professional accountability from a Coach on Team Nerd Fitness! But enough of that, let’s get into the nitty-gritty of how to get started with strength training! How do you build muscle and Strength? Lift Heavy ThingsIf you are going to build muscle, you’re going to need to lift heavy things. This means you’ll most likely need access to a gym with a great free-weight section. Bodyweight exercises can be fantastic for weight loss and keeping the muscle you already have, but if you’re serious about weight training you’ll need a gym with a squat rack, bench, barbells, and a spot to do pull-ups, chin-ups, and dips to be most efficient. Got access to a decent gym? If so, good, it’ll help us get started. Gym closed because of COVID? No problem, here’s how to build a gym in your own home. Because we’re looking to create functional strength and size, we’ll be doing lots of full-body routines with compound exercises that train multiple muscle groups at once. They’re more efficient, they create solid growth and stimulation, and they will keep you safe. Why is that? Well, when you spend all of your time doing stupid isolation exercises on weight machines (ugh), you’re only working those specific muscles and not working any of your stabilizer muscles (because the machine is doing all of the stabilization work). On the other hand, when you do compound exercises like barbell squats, you work pretty much EVERY muscle in your body, setting yourself up to be strong and injury-free. Stay away from machines if you can and focus on dumbbells and barbell exercises. If you’re going to do a full-body routine each workout (which is what I would recommend for ANY beginner), each routine can have one leg exercise, push exercise, pull exercise, and a core exercise:
That’s IT. Don’t worry about adding in any ridiculous machine shoulder shrugs, iso-chest flys, preacher bicep curls, calf-raises, whatever. Learn these few exercises, get really good at them, and your entire body will get stronger and bigger. Focus each week on adding more weight to each exercise. For example, from one week to the next you could do:
If you do that, you’ve gotten stronger. Then, repeat next week. Eat right, and you’ll get bigger too. what’s a sample routine for building muscle?Using the principles I’ve laid out in my “how to build a workout routine” article, here’s a three-day routine I’ve created for myself recently:
Each day has a leg exercise, push exercise, pull exercise, and some core work. While it’s possible to build out the perfect routine on your own, many of our Rebels end up spending hours and hours building something custom – only to realize it isn’t what they need (or isn’t effective) weeks and months later for their goals. For people who want to avoid that altogether, we built the solution – our uber-popular 1-on-1 Nerd Fitness coaching program pairs you with your own Nerd Fitness Coach who will get to know you, your goals, and your lifestyle, and handcraft a workout plan that’s specific to not only your body, but also to your schedule and life. Click on the image below to schedule a call with our team to see if we’re a good fit for each other! How many sets and reps should I do?We have a MASSIVE guide on the exact number of sets and reps you should focus on based on your goals, but you can follow the basics here.
If you get bored, want to change things up, or you’re looking to bust through a plateau, you can do the following:
The good news is that no matter which path you take (pure strength, size, or a mix of both), as long as you are adding weight each week – and eating enough – you WILL be getting stronger. ANY path will work, provided you are progressively overloading your muscles with an increased challenge! So if you do 5 sets of 5 squats at 140 pounds this week, aim for 5 sets of 5 of 145 pounds next week. Or 3 sets of 10 at 100 pounds, then next week try for 3 sets of 10 at 105 pounds. Get stronger, which is 20% of the puzzle. The other 80% is nutrition (which I cover later)! As I said before, if you want even more info, you can head to our article “Determining the Correct Number of Reps and Sets” for a deep dive into the subject. Any other Muscle Training and weight-lifting tips?#1) Warm-up before exercising – don’t walk into a gym, slap 45-pound plates on the bar, and then start your routine. Get your heart rate up and muscles warm first by doing a dynamic warm-up of jumping jacks, lunges, bodyweight squats, hip raises, push-ups, leg swings, jumps, etc. After that, always start with doing a set or two of lifting JUST THE BAR. Only then should you start adding weight for some warm-up sets before moving into your real sets. #2) Have a focused form – if you’re doing a bodyweight squat incorrectly, you might develop bad habits. However, if you do a barbell squat incorrectly with 405 pounds on your shoulders, you could do some serious damage. If you’re just starting out, check your ego at the door: start with a VERY light weight and make sure you are doing the exercise properly. There is NO SHAME in starting with just the bar. You can always add more weight next week if this week is too easy. #3) Stimulate, don’t annihilate – I try to always have one more rep left when I finish a set. Some trainers will preach working your muscles to annihilation, but I think that’s just asking for an injury, poor form, and beyond-sore muscles. Your muscles get built while resting, not in the gym, so don’t worry about destroying them completely each day you step in the gym – it’s not worth it. #4) Change up the time between sets – if you’re doing 3 sets of 5 reps of a really heavy weight, it’s okay to wait 3-5 minutes between sets – you’re focusing on pure strength here. If you’re doing sets in the 8-12 range, try to keep the time between sets around a minute or so. This will affect your muscles in different ways. Learn all about sets and rep ranges. Just be consistent between sets and when doing the same workout between weeks to track your progress. #5) Don’t overdo it – More does not mean better in weightlifting. You don’t need to spend two hours in the gym, you don’t need to do 15 different kinds of chest exercises. My routines last no longer than 45 minutes, I only do three or four sets (after warm up sets) for each exercise, and it’s enough to stimulate muscle growth. Three routines a week is plenty too – you shouldn’t lift every day, as you need to give your muscles time to regrow bigger – remember muscles are made in the kitchen! Less is often more – just make your routines really intense and exhausting. #6) Write down everything – Keep a training journal, and write down exactly how many sets and reps you did for every exercise. That way, you can compare how you did this time with how you did last time. You’ll know how much more you need to lift this week to make sure you’re stronger than last week. #7) Follow a routine, have a plan. The best thing you can do is have a plan to follow and stick with it! We provide a free bodyweight routine, and a comprehensive gym training routine to get you started with strength training in our free guide, Strength Training 101: Everything You Need to Know. Grab your guide when you sign up in the box below:
Download our comprehensive guide STRENGTH TRAINING 101!
Proper diet to gain muscle (and which Supplements)If you’re skinny and trying to bulk up, this will be 90% of the battle. If you’ve been lifting weights for a while “but can’t seem to gain weight,” then you are not eating enough – it’s that simple. I thought I was one of those people who just could never gain weight…and then I learned it was all diet, started eating 4,000 calories a day, and I put on 18 pounds in 30 days. Yeah, I wanted to throw up from always eating along with three Muscle Milk shakes a day, but it worked. Looking back I would have done things differently (so many calories and so much sugar/carbs), but after 6 years of exercising without putting on any weight, it was great to see so much progress in such a short period of time. 4,000 calories sounds freaking insane, right? I know. It makes eating a full-time job. You’ll always either cooking, eating, or cleaning up after yourself. But if you really want to get bigger and you’re struggling to do so, then all of your effort is going to have to go into eating more, eating healthier, and eating ALL THE TIME. I’ve since changed my strategies and gotten much more calculated in my approach. It’s how I (jokingly) went from Steve Rogers to Captain America. Here are a few different techniques for weight gain: PATH #1: Eat a lot of whatever – this was my first plan years ago: it’s cheapest, the fastest, but probably the least healthy. Just make sure you get 200+ grams of protein a day and 3,500+ calories in any way that you can: pasta, rice, pizza, milk, hamburgers, chicken, protein shakes, muscle milk shakes, whatever. This is how I went from 162-180 pounds in 30 days. I’m not proud of how I ate, but it produced results and I remained healthy and strong. PATH #2: Eat a lot of “healthy” stuff – I did this once and put on about 10 pounds in 30 days. Lots of:
Still not optimal, but it works and is better for your insides than the previous method. Still relatively cheap, as tubs of oats, brown rice, and bread are inexpensive and can add on a lot of calories quickly. PATH #3: Eat Paleo – I’ve tried this strategy too, and despite my best efforts to GAIN weight I managed to lose five pounds (all of which was fat). It’s certainly possible to gain weight on the paleo diet (try adding in three big-ass Primal Shakes per day), but it is tricky and very expensive to get 4,000 calories of paleo-approved food daily. LOTS of nuts, eggs, sweet potatoes, shots of olive oil, and yams along with tons of chicken, grass-fed beef, fruit, and veggies. PATH #4: GOMAD (Gallon of Milk a Day) – Obviously this method will only work if you’re not lactose intolerant. Oh, and it has to be whole milk. You’ll definitely put on some fat, but you’ll build muscle and get really strong quickly – and then you’ll adjust the diet to thin out. I’ve attempted this diet occasionally, as whole milk is certainly a fast path to tons of carbs, fat, protein and calories. Be prepared for your stomach and body to constantly feel bloated. Note: you can adjust the amount of milk you consume daily based on how your body responds. “Which Supplements Should I Take to Build Muscle Quickly?” As we lay out in our Nerd Fitness Supplement Guide, most supplements are a waste of money and completely unnecessary for building muscle. However, there are two supplements that CAN BE helpful in building muscle quickly:
Are you vegan and trying to build muscle? Read our full article on how to go plant-based properly! How many calories should I eat to build muscle?That’s going to depend on your situation – your age, how much you weigh now, how much you want to weigh, and how fast your metabolism is. For some, just 2,500 calories and strength training will be enough to build muscle. For others, you might need to eat 4,000+ calories in order to put on weight. The only way to find out is to track your normal calorie intake for a few days, and then start adding on 500 extra calories per day for a week or two and see if you notice any changes. Want a rough idea of how many calories you should be eating? Head right here for our calorie requirement calculator. Bottom line: If you don’t see any change, then you need to eat more.
But if you really want to be bigger, then you are going to need to really dedicate yourself in the kitchen. Unless you’re a genetic mutant, it’s incredibly tough to build muscle and strength without overloading your system with calories and nutrients. Just keep eating. Won’t all of this eating make me fat? I don’t want to get bulky.
I get this question all the time in emails, usually from guys who are 6 feet tall and 130 pounds. Don’t worry, if you can’t gain weight now, putting on extra weight is going to be great for you. Yes, you will put on SOME fat along with the muscle you’re building if you’re running a calorie surplus. This is why picking the right amount of calories per day is important:
Everybody is different, so you need to experiment and find out what works best for you. Once you get to your desired weight (actually, aim for about 10-15 pounds heavier than your goal weight), you can scale back the calories, add in some extra sprints to the end of your workout, and keep lifting heavy – the muscle will remain, the fat will disappear, and you’ll be left with the body you want. I’m not skinny, I need to LOSE weight – what’s different for me?You can actually build muscle and lose body fat at the same time. You just have to be careful about how you do it. We cover the subject in depth in the post, “Can You Lose Weight and Gain Muscle at the Same Time?” This gist goes like this: If you are eating enough protein, and have decent fat stores to pull from for energy needs, you can build muscle even while in a caloric deficit. As long as you are resting (next section) and strength training (previous section), you can shed body fat while still putting on muscle. Now, this only works if you have plenty of fat stores to pull from. Once you start to lean out a little, you’ll likely have to increase your calories to start putting on more muscle. I recently added some strength (and muscle) while losing 22 pounds in 6 months. Just remember, you can build muscle while losing weight if you:
Let’s talk about that last one for a bit. Rest days for building muscle and strengthIf you’re skinny and trying to bulk up and build muscle, avoid cardio like the plague (also avoid the plague). Why? Take a look at the best marathon runners in the world, and compare their physique to somebody like Usain Bolt, the best sprinter in the world – tons of muscle, power, and a body to envy. There’s nothing wrong with EITHER body – we’re all awesome and are special and blah blah blah. But you’re reading an article about how to build muscle fast, right? So focus all of your effort on building muscle! You want all the calories you’re consuming to go towards “building muscle,” and not “fuel my run.” I will admit that I’m biased against chronic cardio, but mostly because it bores me! You can be far more effective when you focused on getting stronger and only do ‘cardio’ on things you enjoy – after all, your success will largely depend on your nutrition, NOT your cardio! Personally, I spend three days a week in the gym, with each workout clocking in at 45 minutes. I go for long walks on my off days along with a day of sprints to stay active, but I know that my muscles get built while I’m resting, not when I’m working out. I really focus in on my workouts to make them as exhausting as possible, and then I give my body ample time to recover (while eating enough calories to produce a surplus). If you’re lifting heavy, and eating enough, make sure you’re also getting enough sleep! 5-6 hours a night isn’t going to cut it – you need to get at least 8-9 hours of sleep per night for optimal muscle-building. Take naps too if you have the opportunity. Sleep needs to become a priority. If you’re a big guy/girl trying to slim down, a little extra cardio might speed up your fat loss but if you’re not eating correctly, it might result in losing some of the muscle you already have. Don’t worry about going for 10 mile runs on your off days – do 20-30 minutes of intervals or go run hill sprints in your park. The weight will come off more slowly, but you’ll only be losing fat, not fat AND muscle. Once you hit your goal weight and the target amount of muscle mass, I’d recommend adding back in some cardio for your overall conditioning, but keep it varied (sprints and intervals). The focus is to keep building explosive muscle and not long, slow, boring muscle. If you love going for long runs and aren’t going to give that up, I’m not gonna stop you. Just know that the long hours of cardio will severely inhibit your progress on building strength and size. Get Started Building Muscle TodayThis is a basic overview to get ya started. It really boils down to a few major things:
Simple to understand, tough to implement. Trust me, I know – I’ve been battling this for the past decade. If you made it this far, and you want more specific instruction, here’s how Nerd Fitness can help! 1) If you are somebody that wants to follow a tailor-made program designed to build muscle and grow strong, check out our popular 1-on-1 Online Coaching Program. You’ll work with our certified NF instructors who will get to know you better than you know yourself, check your form, and program your workouts and nutrition for you. 2) If you want a snazzy app to teach you exactly how build muscle and strong, check out NF Journey. Our fun habit-building app helps you exercise more frequently, eat healthier, and level up your life (literally). Try your free trial right here: 3) Join the Rebellion! We need good people like you in our community, the Nerd Fitness Rebellion. I’ll send you two free resources that will help you reach your goals: our massive Strength Training 101 guide and a Bulk Up Cheat Sheet and Shopping List.
Download our comprehensive guide STRENGTH TRAINING 101!
So did I miss anything: Any unanswered muscle building questions? Do you have any tips or tricks I’m missing? Any success stories from our community to share? Post your questions in the comments and I’ll go ahead and answer them. Let’s hear your strength and muscle stories! -Steve PS: Be sure to check out the rest of our Strength Training 101 series:
### All Photo Sources are found right here.[1]
Footnotes ( returns to text)
via https://www.nerdfitness.com/blog/the-beginners-guide-to-building-muscle-and-strength/ This circuit training guide is gonna give you EVERYTHING you need to do your first kickass circuit training workout today. I mean come on, it has dinosaurs in it. These workouts are similar to the custom programs we build for our Online Coaching Clients who work out at home, on the road, and in outer space. Okay, FINE we don’t have any clients in space (yet). But we do have clients in Antarctica, and multiple aerospace engineers. Close enough? If you’re hoping circuit training will maximize your results in a minimum amount of time, one of the 15 circuits below will do the trick:
What Are the Benefits of circuit training?
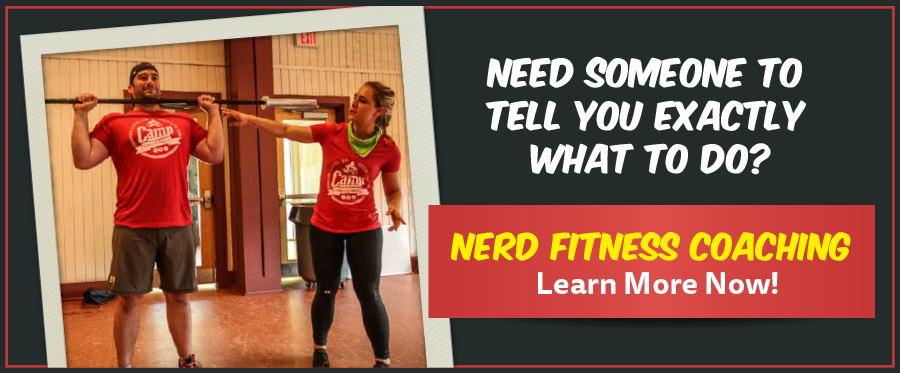
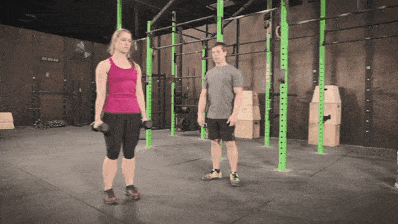
The “circuit” in circuit training comes from the fact that you do a sequence of exercises back to back to back, and then you repeat the sequence. And then again. You cycle through the planned sequence of exercises, or circuit, multiple times. That’s circuit training. Generally, you hit each major muscle group during one full circuit. You may do a lower body for one exercise. Then the upper body the next. You’ll find all sorts of different circuit training sequences. Here are some things most will have in common:
Make sense? The point here is to work different parts of your body with different exercises, and then while those parts are recovering, you’re working on your other movements! This helps build cardiovascular health, while also improving muscular endurance and strength. Plus you’ll burn calories! As we lay out in our article, Cardio vs Interval Training vs. Weight Training, research supports that doing strength training circuits is great for weight loss and overall health. More importantly, for somebody with limited time, doing a strength training circuit is more effective at building strength and burning fat than an equivalent amount of cardio. In other words, if you are trying to lose weight, you should be doing circuit training. Our Beginner Bodyweight Circuit would be a great place to begin, and you can download a worksheet to help you get started right here:
Grab Your Beginner Bodyweight Routine Worksheet. No Gym Required!
Why Should I do circuit training?Generally, you’ll hear exercise divided into strength training or aerobic exercise (cardio). What’s the difference, you wonder?
The thing about a circuit is, you actually do both categories. Presses and lunges fall into strength training. Jumping jacks are cardio. And since you aren’t stopping much in between stations, you’ll need more oxygen, and voila. Even more cardio. With circuit training, you build muscle and burn fat WHILE building stamina. As Michael Scott would say, “that’s a win, win, win.” There’s some debate on what kind of exercise is better for weight loss: aerobic or anaerobic. My thoughts? If you’re limited on time and only can pick one, I would pick strength training: when you strength train, you break your muscles down, and your body needs to work extra hard over the next 24-48 hours to rebuild those muscles (with increased calories burned). We work with our 1-on-1 Coaching Clients to create programs that combine both strength and cardio in a fun way – it really comes down to a program that you actually WANT to do. Before and after your circuit training: Warm up and stretchNo matter which circuit you pick, I want you to start with one important thing: Warm-up! I cover why you should always warm up in an article found right here. It doesn’t have to be much though, give it about five minutes to get your muscles active and your heart rate up. This will help you do exercises properly and help prevent injury. You can run in place, do air punches and kicks, or some jumping jacks. Here is NF Senior Coach Staci (you might know her incredible story) showing you many beginner options you can use to warm up as well: Did I just tell you to prepare for circuit training, with a circuit?! If you’re curious, here’s my personal (advanced) warm-up:
Our goal isn’t to tire you out. Instead, we want to warm you up. That’s step one. Completing your chosen circuit training routine would be step two. Below, you’ll find 15 workouts you can follow along with! And if you like our style of workouts, you might like our new app, Nerd Fitness Journey! Our fun habit-building app helps you exercise more frequently, eat healthier, and level up your life (literally). Right now, you can try it for free for a full week (no credit card required). Jump in below: Beginner Bodyweight Workout CircuitThis workout circuit, as we lay out in our Beginner Bodyweight Workout article, is as follows:
Run through this circuit three times. If you don’t have milk in the house for the rows, find something of roughly the same weight with a good handle. If you want to download this Beginner Bodyweight Workout as a worksheet, you can do so when you sign up in the box below:
Grab Your Beginner Bodyweight Routine Worksheet. No Gym Required!
Advanced Bodyweight Exercises CircuitIf the beginner circuit above is too easy for you, move on to our Advanced Bodyweight Workout Circuit. The workout looks like this:
I warn you, the above circuit will hurt… in a good way. You should be proud if you can get through this three times. Playground Workout CircuitDo you have a nearby playground? Why not work out there! If you have kids, you can do it together. Or let them ignore you. I’ll give you a Level One workout, and a Level Two. Check out the main playground article for some Level Three exercises. Level One
Level Two
After you’ve gone through a complete set three times, go down the slide! Kettlebell Workout CircuitHave a kettlebell lying around? Use it for a circuit! Here’s our kettlebell workout full write-up, but you can also just watch the video and see the workout here:
Once you’ve done the above three times, go ahead and put your kettlebell away for your final step: stretches. If you want a kettlebell worksheet for this workout, grab one by signing up in the box below:
Grab Your Beginner Kettlebell Routine Worksheet!
We also have a fun new adventure in our app that will allow you to train with your kettlebell right alongside Hack Morris (this will make sense more sense when start). Jump in right now for your free trial: Beginner Gym Circuit Training
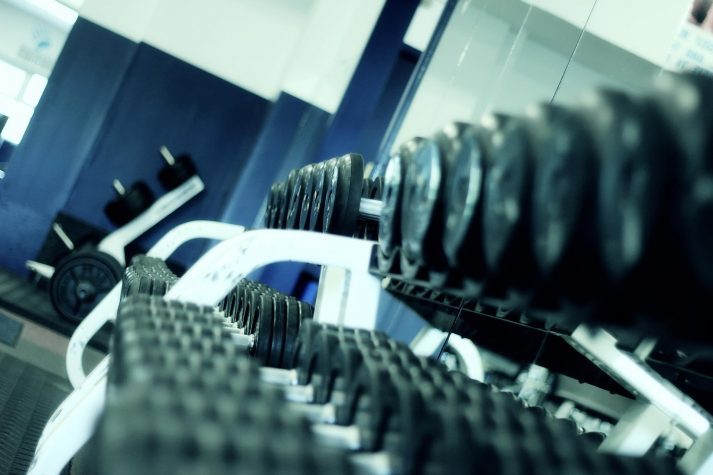
If you have access to a gym, you have a lot of circuit options. If it’s your first time stepping foot in a fitness facility, check out our Beginner’s Guide to the Gym. The gym can be a scary place, but we’ll give you a strategy to get comfy. (Gym closed do to COVID? Here’s how to build a gym in your home.) We’ll also walk you through each movement for both Days A and B below. I would recommend picking one of our 5 Beginner Gym Workouts, going through the leveled progressions, and working your way up to the circuits below: DAY A GYM WORKOUT
Day B GYM WORKOUT
Alternate your circuits on different days. Rest in between. “Day A” could be Monday. Rest Tuesday. Wednesday could be “Day B.” We LOVE helping people get started in the gym, as we’re huge fans of barbell training and helping beginners build confidence with weight training! If that sounds like you… And you can download our full Strength 101 guide too, which has this routine along with other circuits to help you start building strength today:
Download our comprehensive guide STRENGTH TRAINING 101!
The Hotel Workout Circuit: For Travelers that TrainSometimes, you just plain find yourself stuck in a hotel room. Maybe you can find the hotel gym, but I bet it’s terrible! It probably has 2 machines, a broken treadmill, and no free weights. Ugh. Instead, how about a workout circuit you can do in the room itself! Utilize the furniture to its full potential. Level 1
Level 2
Set the alarm clock to 15 minutes from now and see how many circuits you can do! Check out our full post on hotel circuits if you want Level 3! We have a LOT of business travelers in our 1-on-1 coaching program, which is why we create workouts for both their home gym and while traveling! If you need worldwide accountability, workouts for home and the road, and want expert guidance… Nerdy Circuit Training ExercisesIf those workouts above don’t tickle your fancy, we have these other nerdy circuits you can do too! The Batman Workout CircuitDay 1
Day 2
The Lord of the Rings Workout CircuitSuperset 1: The Fellowship of the Ring
Superset 2: The Two Towers
Superset 3: The Return of the King
If you can get through a superset three times, consider yourself an honorary Ranger. Nothing found in Mordor can faze you. The 300 Workout CircuitThe below circuit is no joke. Then again, neither were the Spartans.
The above sequence is designed to be completed once. If you can go through it twice, you’re ready to defend Greece. The Wolverine Workout Circuit
How many times do you do this circuit? AMRAP, or, As Many Rounds As Possible. I suggest setting a 12-minute timer and getting to work. Be careful though, because only Wolverine can heal automatically. You’ll need actual rest. Boom! There are your nerdy circuits. Feel free to rock the soundtrack of the referenced movies during your workout. If you own a cape, now’s the time. Complete List of Circuit Training ExercisesYou can do any of the workouts in this article and get a great workout, but if you want to build your own workout, you can totally do that too! Here is a list of exercises you can use to create your workout. Simply pick a few, and do one after the other in as many circuits as you want! Pick your exercises from this list to build your own circuit training workout, or suggest your own for us to add in the comments below! CARDIO EXERCISES:
UPPER BODY PUSH EXERCISES:
UPPER BODY PULL EXERCISES
LOWER BODY EXERCISES
Pick 3-5 exercises, and arrange them as we discuss in our “how to build your own workout routine.” We also have The 42 Best Bodyweight Exercises for movements that you can choose from. Do 3 circuits with 10 reps of each exercise, one after the other! Have fun and keep things interesting. And if you don’t want to build your own workout, that’s cool too! We have 15 free workouts in this article, and we can also do all the heavy lifting for you. Well, not literally DO the heavy lifting, but you know what I mean. We create custom workout solutions for busy people just like you in our 1-on-1 Coaching Program. Let us create a workout and help you make better food choices. It’s like having a Yoda in your pocket (again, not literally). How to Stretch After Circuit TrainingOnce you finish your workout, the final step (three) would be stretching and cool down. No matter what circuit you go through, stretch after a workout. It can help a lot with muscle recovery. Scope this video for an awesome stretching sequence to follow: You could also do some yoga poses. For stretching, find what feels good and take your time. Let your heart rate come down while you stretch. You could even do some foam rolling too if you’re a glutton for punishment! For more ideas on how to make the most of your stretches, check out The Ultimate Guide for Improving Flexibility in 30 Days. It has Spider-Man in it, so you know we aren’t messing around. Getting Started With Circuit TrainingThere are all sorts of different ways to do circuit training. We just showed you fifteen.
YOUR MISSION: Complete one of the above circuit training workouts! If you don’t know which one to pick, start with the Beginner Bodyweight Circuit. It’ll get you used to the idea of hustling from one exercise to the next. And you can do it in your living room! If you’re looking for more hands-on instruction and customized guidance, check out our 1-on-1 Coaching program. You’ll work with our certified NF instructors who get to know you better than you know yourself, and then build a workout program that is specific to your exact goals. Simply put, we tell you exactly what to do every day, and how to eat. And then, we check in with you regularly to make sure you’re doing it! If you got this far in the article, I really want you to try one of these workouts. Right NOW. I always mention the most important step in a fitness journey is starting it. Today, start circuit training. Once completed, I’d love for you to share your story with the community in the comments:
Find a circuit you’re comfortable with, and do it. Then do it next week. And the following. And track your progress! If you add circuit training to your fitness routine, you’ll be on a solid path for leveling up your life. -Steve PS: I couldn’t quite figure out how to use this gif, but it was too good not to include. If someone creates the “Short Circuit Workout Circuit” you’ll be my best friend forever. ### All Photo credits can be found right here[1].
Footnotes ( returns to text)
via https://www.nerdfitness.com/blog/circuit-training-build-some-muscles-burn-some-fat/ Barley grass powder is one of the healthiest foods you can consume. It is made from the dried young leaves of the barley grass plant. This is important because the nutrient content of young barley leaves is comparable to that of vegetables. As the barley plant ages, however, it becomes a grain with a completely different and less healthy nutrient profile.1 Nutrients in Barley Grass PowderBarley grass powder packs a potent nutritional punch. Barley grass is 29.5% fiber, 27.3% protein, and 4.57% fat.2 The nutrient content of barley grass depends upon its stage of growth and method of processing, but in general, a 100 gram serving of barley grass contains:3
Barley grass is so nutritious and health promoting that researchers who conducted a review of research on the health benefits of barley grass noted: “The data summarized in current review point out that major mechanism[s] and more than 30 functional ingredients of barley grass exert [a] potent preventive [that] exceed 20 chronic diseases.4 Health Benefits of Barley Grass PowderThough covering the beneficial effects of barley grass powder on more than 30 chronic diseases is outside the scope of this article, we will review three important ones -- weight, heart, and blood glucose. Barley Grass Powder and Weight LossIf you want to lose weight, you might want to stir a couple tablespoons of barley grass powder into your morning smoothie. Barley grass powder is a low-calorie food, containing just 45 calories per 2 tablespoons. Adding this powder to your diet can help keep your total calorie limit low. Plus, two tablespoons of barley grass powder contain a whopping 4 grams of fiber. Quite simply, eating a high-fiber diet fills you up fast and keeps you feeling full longer, helping keep you from overeating. And this is not just a theory. Clinical research studies show an association between increased fiber intake and weight loss.5 So, increasing your fiber intake with barley grass powder may be a great way to lower your calorie intake and lose weight -- without deprivation or willpower! Barley Grass Powder May Support Heart HealthWith heart disease being the leading killer of US adults, it is important to find a way to reduce your risk of this disease. And adding barley grass powder to your diet is a great way to do that.6 Barley grass contains many heart-protective nutrients, including a whopping 3384 mg of vitamin K per 100 grams. Research shows increasing your intake of vitamin K may help prevent hypertension, a major cause of heart disease, and support heart health by decreasing inflammation and oxidative stress.7 Plus, barley grass contains compounds, such as saponarin, shown to decrease blood sugar levels and support heart health in clinical research trials.8 Barley Grass Powder May Help Regulate Blood Sugar LevelsElevated blood sugar levels can lead to obesity and type 2 diabetes if proactive steps are not taken to reverse it, and barley grass powder by help. Though the exact mechanism for its blood sugar lowering effects has not yet been discovered, insoluble fiber may play a role. Insoluble fiber stays in your gastrointestinal tract longer than other foods and significantly slows the absorption of glucose into your bloodstream. This leads to a gradual rise in blood sugar levels rather than sharp spikes, which can decrease hunger and cravings for starchy carbs and help defend against obesity and type 2 diabetes.9, 10 An Easy Way to Get your Barley Grass PowderBarley grass powder is such a great source of nutrients that SANE included it in Garden in my Glass, their wildly popular health-promoting product featuring more than 30 of the most potent fruit and vegetable powders ever created! Click here to place your order for Garden in my Glass, but you must hurry. It is almost impossible to keep this product in stock, and once it is sold out, it takes months to restock it! References 1- Webmaster. Barley Grass Powder - benefits, nutrition and other information. All 4 Natural Health. Accessed Jan 14, 2021. http://www.all4naturalhealth.com/barley-grass-powder.html 2- Zeng Y, Pu X, Jiazhen Y, Juan D, Yang X, Xia L, Yan Z, Tao Y. Preventive and Therapeutic Role of Functional Ingredients of Barley Grass for Chronic Diseases in Human Beings. Oxidative Medicine and Cellular Longevity. 2018(3):1-15. DOI: 10.1155/2018/3232080 3- Zeng Y, Pu X, Jiazhen Y, Juan D, Yang X, Xia L, Yan Z, Tao Y. Preventive and Therapeutic Role of Functional Ingredients of Barley Grass for Chronic Diseases in Human Beings. Oxidative Medicine and Cellular Longevity. 2018(3):1-15. DOI: 10.1155/2018/3232080 4- Zeng Y, Pu X, Jiazhen Y, Juan D, Yang X, Xia L, Yan Z, Tao Y. Preventive and Therapeutic Role of Functional Ingredients of Barley Grass for Chronic Diseases in Human Beings. Oxidative Medicine and Cellular Longevity. 2018(3):1-15. DOI: 10.1155/2018/3232080 5- Lattimer JM, Haub MD. Effects of dietary fiber and its components on metabolic health. Nutrients. 2010;2(12):1266-1289. doi:10.3390/nu2121266. 6- Centers for Disease Control. Heart Disease Facts. CDC. Page last reviewed: Sep 8, 2020. Accessed Jan 14, 2021. https://www.cdc.gov/heartdisease/facts.htm 7- Zeng Y, Pu X, Jiazhen Y, Juan D, Yang X, Xia L, Yan Z, Tao Y. Preventive and Therapeutic Role of Functional Ingredients of Barley Grass for Chronic Diseases in Human Beings. Oxidative Medicine and Cellular Longevity. 2018(3):1-15. DOI: 10.1155/2018/3232080 8- Zeng Y, Pu X, Du J, et al. Molecular Mechanism of Functional Ingredients in Barley to Combat Human Chronic Diseases. Oxid Med Cell Longev. 2020;2020:3836172. Published 2020 Mar 30. doi:10.1155/2020/3836172 9- Takano A, Kamiya T, Tomozawa H, Ueno S, Tsubata M, Ikeguchi M, Takagaki K, Okushima A, Miyata Y, Tamaru S, Tanaka K, Takahashi T. Insoluble fiber in young barley leaf suppresses the increment of postprandial blood glucose level by increasing the digesta viscosity. Evid Based Complement Alternat Med. 2013;2013:137871. doi: 10.1155/2013/137871. Epub 2013 Nov 24. PMID: 24348688; PMCID: PMC3857754. 10- Chandalia M, Garg A, Lutjohann D, von Bergmann K, Grundy SM, Brinkley LJ. Beneficial effects of high dietary fiber intake in patients with type 2 diabetes mellitus. N Engl J Med. 2000 May 11;342(19):1392-8. doi: 10.1056/NEJM200005113421903. PMID: 10805824. Via https://store.sanesolution.com/blogs/supplements/barley-grass-powder Via https://sanesolutions.weebly.com/blog/barley-grass-powder If you have never tried alfalfa leaf powder, you’re missing out on a major nutrient powerhouse! Alfalfa leaf powder is a highly concentrated form of alfalfa, a word that means “father of all foods” in Arabic. True to its name, alfalfa has been used in traditional herbal medicine for hundreds of years in China, Turkey, Iraq, and America.1, 2 Health Benefits of Alfalfa Leaf PowderAncient cultures valued alfalfa, also called Medicago sativa, for it’s healing properties. They had no idea of the nutrient profile of this plant, of course, only that they witnessed the almost miraculous health results of its application. Modern medical science has only recently discovered why alfalfa leaf is said to provide so many health benefits. Seems alfalfa is a major source of phytoconstituents, chemical compounds that protect plants from bugs, fungi, and other threats. Major classes of phytoconstituents in alfalfa include:3
Though often deadly or at the very least a deterrent to bugs and other threats, these chemicals are often beneficial for human health! Alfalfa leaf also includes the following vitamins and minerals:4
Given the nutrient profile of alfalfa, it’s not surprises it has been used to treat infections, ulcers, heart disease, stroke, cancer, diabetes, abnormal cholesterol levels, and more.5 Here are 3 science-backed health benefits of alfalfa leaf. May Boost Immune SystemClinical research studies suggest alfalfa leaf may boost immunity due to its saponin content. Saponins are found in over 100 families of plants and have been shown to have amazing health benefits. Research suggests saponins may support the immune system and overall health...and may even defend against cancer.6 May Lower CholesterolThere is also strong scientific evidence that saponins in alfalfa leaf may also reduce blood lipids, thereby lowering cholesterol levels. Over time, high cholesterol causes plaque deposit in your blood vessels that can accumulate, eventually cutting off blood flow to your heart or brain and causing heart attack or stroke.7, 8 May Defend Against Illness and DiseaseAlfalfa leaf is a rich source of flavonoids, a phytochemical found only in plant foods. Multiple research studies indicate that flavonoids have potent antioxidant and anti-inflammatory properties that may help defend against many conditions and diseases. For instance, studies show that flavonoids may help lower blood pressure, reduce the risk of heart disease, and decrease the risk of type 2 diabetes. As many experts believe chronic inflammation to be the underlying cause of most chronic health conditions, alfalfa’s potent anti-inflammatory properties may indeed support overall health and defend against most chronic illnesses. 9, 10, 11, 12 Alfalfa Leaf Powder for YOUR Health!Alfalfa leaf powder is one of the superfoods included in Garden in my Glass, SANE’s proprietary blend of optimal powdered fruits and vegetables. Simply add it to your morning smoothie or sprinkle it over your food to experience its amazing health-promoting benefits. Click here to learn more about Garden in my Glass and to place your order before supplies of this phenomenally popular product runs out! References 1- Dr. Edward Group. Benefits of Alfalfa Leaf. Global Healing. Nov 24, 2015. Accessed Jan 12, 2021. Accessed Jan 12, 2021. https://globalhealing.com/natural-health/benefits-of-alfalfa-leaf/ 2- Bora KS, Sharma A. Phytochemical and pharmacological potential of Medicago sativa: a review. Pharm Biol. 2011 Feb;49(2):211-20. doi: 10.3109/13880209.2010.504732. Epub 2010 Oct 25. PMID: 20969516. 3- Bora KS, Sharma A. Phytochemical and pharmacological potential of Medicago sativa: a review. Pharm Biol. 2011 Feb;49(2):211-20. doi: 10.3109/13880209.2010.504732. Epub 2010 Oct 25. PMID: 20969516. 4- Nutrition Date. Alfalfa Seeds, Sprouted, Raw. Accessed Jan 14, 2021. https://nutritiondata.self.com/facts/vegetables-and-vegetable-products/2302/2 5- Bora KS, Sharma A. Phytochemical and pharmacological potential of Medicago sativa: a review. Pharm Biol. 2011 Feb;49(2):211-20. doi: 10.3109/13880209.2010.504732. Epub 2010 Oct 25. PMID: 20969516. 6- Shi J, Arunasalam K, Yeung D, Kakuda Y, Mittal G, Jiang Y. Saponins from edible legumes: chemistry, processing, and health benefits. J Med Food. 2004 Spring;7(1):67-78. doi: 10.1089/109662004322984734. PMID: 15117556. 7- Shi J, Arunasalam K, Yeung D, Kakuda Y, Mittal G, Jiang Y. Saponins from edible legumes: chemistry, processing, and health benefits. J Med Food. 2004 Spring;7(1):67-78. doi: 10.1089/109662004322984734. PMID: 15117556. 8- Mayo Clinic Staff. High Cholesterol. Mayo Clinic. Accessed Jan 14, 2021. https://www.mayoclinic.org/diseases-conditions/high-blood-cholesterol/symptoms-causes/syc-20350800 9- Clark JL, Zahradka P, Taylor CG. Efficacy of flavonoids in the management of high blood pressure. Nutr Rev. 2015 Dec;73(12):799-822. doi: 10.1093/nutrit/nuv048. Epub 2015 Oct 21. PMID: 26491142. 10- Ponzo, V., Goitre, I., Fadda, M. et al. Dietary flavonoid intake and cardiovascular risk: a population-based cohort study. J Transl Med 13, 218 (2015). https://doi.org/10.1186/s12967-015-0573-2 11- Xu H, Luo J, Huang J, Wen Q. Flavonoids intake and risk of type 2 diabetes mellitus: A meta-analysis of prospective cohort studies. Medicine (Baltimore). 2018;97(19):e0686. doi:10.1097/MD.0000000000010686 12- Hunter P. The inflammation theory of disease. The growing realization that chronic inflammation is crucial in many diseases opens new avenues for treatment. EMBO Rep. 2012;13(11):968-970. doi:10.1038/embor.2012.142 Via https://store.sanesolution.com/blogs/supplements/alfalfa-leaf-powder Via https://sanesolutions.weebly.com/blog/alfalfa-leaf-powder A handstand is one of the coolest exercises ever, but it’s also one of the most advanced moves to learn. Fortunately, you’ve come to the right place. Today you start your journey to the Upside-Down! Ah, not that Upside-Down…we’ll keep you in this dimension. We’ve helped many of our coaching clients achieve their first handstand and today we’ll share with you how it’s done with this guide! We’ll treat it like a video game, progressing you from complete noob to Level 6: Handstand Master. We’ll go over the following (click to flip to that section):
The tutorials ahead are from our premium course Nerd Fitness: Handstands, which you gain access to under a Nerd Fitness Prime membership. I would encourage you to check out if you like what you see here. Alright, brace yourself to get flipped-turned upside down.
Are Handstands Good for You? (3 Reasons Why Handstands Rule)At Nerd Fitness we LOVE handstands like Eleven loves waffles. Here are 3 reasons why handstands rule: #1) Like other bodyweight training, there’s no excuse. If you have room to stand up, you have room to practice handstands. #2) It recruits DOZENS of muscles in your body. From arm strength to wrist mobility to core strength to shoulder mobility and muscular endurance, handstands do it all. When you are trying to balance, it makes your body work as one complete unit. #3) It scares you – yes, that’s a positive. We grow outside our comfort zone and for many people, just the thought of a handstand is enough to make their palms sweaty, knees weak, arms are heavy, vomi… …nevermind. The point is that the handstand is just as much of a mental challenge as it is a physical one. How scared do you think this guy gets on a regular basis? That’s Coach Jim! Master of the NF Fitness Universe, and our lead trainer for our Handstands Course and Nerd Fitness Coaching. You’ll be seeing a lot of him in today’s article because Jim can do handstands in his sleep.[1] The Secret to Performing a HandstandSure, we need to build strength to support ourselves upside-down, but even that hurdle is overblown. A proper handstand actually starts to feel easy. That’s because once you’re balanced and aligned, it becomes uber efficient. Just as you don’t exert yourself much if you stand straight with good posture, a good efficient handstand is the same way… it will soon start to feel effortless. Actually, the biggest hurdle to overcome – especially at the beginning – is the mental fear. The voice/feeling in the back of your head that says “you could get hurt doing this!” SCARY! And I won’t sugar-coat things, you CAN hurt yourself working on these skills… but it’s no different than if you walked into the gym first day, slapped 315 lbs on the bench press, and gave it a go. Or went out and tried to run 13 miles without training. The exercise itself isn’t dangerous, unless you attempt TOO much, too quickly. If you wouldn’t load up a bar to deadlift 500 lbs on your first day in the gym, why do so many people just kick and fling themselves up into a handstand, failing repeatedly, hoping one day they’ll “get” it? There’s a smarter way! How do we overcome this fear and keep ourselves safe? Just like learning any other fitness skill: slow, easy, successful steps! These small victories accumulate over time to bring us to our goals safely while having a lot of fun. Are you ready to learn? Don’t worry, we’ve got you covered. Read on for ways to safely progress to handstand mastery! Handstand Progression Warm-Up RoutineFor any handstand exercise, there is going to be a significant amount of stress on the hands and wrists. So, it’s important you stretch and warm things up. Here is a video from our NF Handstands course going over some of our favorite wrist stretches to prepare to get upside-down. Go through each stretch about 10 times. Let’s spotlight a few of these Handstand Warm-Up exercises: Forward and Back Wrist Stretch: Lifted Palms Wrist Stretch: Reverse Palm Stretch: Backhand Palm Stretch: Upside Down Wrist Stretch: The trick with wrist stretches is to move in as many different ways as feels comfortable. Feel free to make the warm-up your own! The shoulders are another stressed area in the handstand. There are several ways we can prepare them for work A few rounds of jumping jacks: Or arm circles That will get the blood moving and the area ready. From here, we’ll begin our journey leveling up your Handstand Progression. We’ll start by having you work with some balance drills and some positional drills. Nothing too crazy, and in fact some of these might seem TOO EASY. That’s fine! That’s what we want, remember? We’re using small victories to motivate us. Landing on your head is not a great way to motivate anyone. Want someone to build you a custom made progression plan for doing your handstand? Our 1-on-1 Online Coaching Program will do just that, plus your coach can review your movements through our app so you’ll know your training correctly and safely. Level 1 Handstand Progression: Quadruped RockingYou may be thinking that feeling the balance of a handstand is going to be brutally difficult. Not so! We can start quite easily on our hands and knees in the quadruped position. From here, we will simply rock forwards and backwards on our hands. Seem familiar? If you did the wrist mobility we described above, it’s the same motion! Isn’t that handy?[2] As you are rocking back and forth, feel where the weight rests in your hands.
Where do we want it in the handstand? Right around the knuckles. This is a balanced spot – similar to the balance you find when standing. You don’t sit all your weight on your heels, and you don’t lean all your weight forward, gripping your toes hard into the ground, do you? Find and feel that balance when you rock. When should you move on to Level 2 Handstand Progression? Now would work! Level 2 Handstand Progression: Hollow BodyThe hollow body is one of the best ways to engage the midsection and stabilize the body. It will help to give your handstand a good shape. Do you need to master the hollow body to master the handstand? Not necessarily, as there are plenty of handstands out there that are a bit banana-shaped. But the hollow body will help you create a more efficient position. #1) Start by laying down a yoga or exercise mat on the ground and laying on the ground face up. #2) Think about pressing your lower back down into the ground and engaging your midsection like you’re coughing. You should still be able to breath! #3) Once the midsection is set, tuck your knees to your chest and hold your shins like you’re getting ready for a wicked cannonball. #4) Holding the shins will help you maintain that lower back and midsection position. Still feeling good? Then try rocking!
If you need more of a challenge, reach your arms by your ears, keep the knees tucked, and rock some more. Without the hands holding the shins, the midsection really has to keep engaged in order to give you a smooth rock. With any of these positions, work to rock for a full 15 seconds under control. Once you can do so with arms extended, progress up to Level 3. Level 3 Handstand Progression: Crow PoseTo enter Crow Pose, move forward from the Quadruped Rock position so that your knees are on the outside of your arms. You can even bend the elbows a little and rest your legs on them. Rock forward in the same manner as before, putting a little more weight on the hands and a little less weight on the feet. Important: this isn’t Assassin’s Creed… We are not making a leap of faith here! Don’t jump!!! We are simply looking for less and less weight on the feet. Take things slow and easy – rising up on the toes when you can. When you are ready to pick the feet up and hold yourself off the ground on just your hands, it should come naturally. Be sure to grab into the ground hard to hold and control yourself, and feel free to put down a pile of pillows or mats in front of you if you should fall! Once you’re able to get both feet off the ground comfortably and safely, it’s time for Level 4 Handstand Progression. If you find yourself stuck at the crow position or any other level, we are here to help! Our coaches can review your progression and form to help you advance onto the next level! Level 4 Handstand Progression: Wall WalkIn this level, we’ll get started working toward something that actually looks like a handstand! All we’re trying to do with this exercise is support our bodyweight on our straightened arms (just like the front plank or push-up). So, the first level of this exercise is to simply get yourself up into the top of a push-up and hold. If that’s too hard, put your hands up on an elevated surface and/or rest on your knees and hands instead. Once this is mastered, level up by simply lifting your hips in the air into a down dog position! From here, it’ll be a matter of getting your feet onto a higher and higher surface. Note: putting your feet up something even a few inches off the floor counts – small steps! You can use something as simple as bumper plates: As you progress, add more bumper plates (or whatever you’re using) so your feet are higher and higher. Once you are supporting yourself with your feet on a high box, try walking your feet up the wall. (Think of it like a really tall box!) Be careful at this step: Be sure you have enough energy to walk back down safely and second, that you don’t walk too close to the wall and risk flipping onto your back! See the next section on pirouettes to safely exit these wall walks if you happen to “go over!” With each of these variations, we’re looking to build up to a solid 15 seconds under control before moving forward. Once you’re at the point of lying vertically against the wall, you’re on your way to leveling up to a full handstand! But first, we need to talk about how to bail safely. Level 5 Handstand Progression: How to Bail out of a HandstandAs you start to get better with Wall Walks, and you practice getting closer and closer to completely vertical while upside down, there’s going to be instances where you start to “tip over.” In order to safely return your feet to the ground, you’re going to want to do what we call a pirouette: How to bail out of a handstand:
This is one of the most important skills you can learn as you develop your handstand practice, as it will allow you to safely exit any handstand without any risk of injury as you develop your balance! Once you feel comfortable bailing out of a handstand, my dear rebel, it is time for Level 6! Level 6 Handstand Progression: How to Do a HandstandWe are now ready for you to try a handstand! It’s going to come down to you slowly but surely leaving the safety of the wall. First, just try to take one leg off the wall during your wall walk: When you’re comfortable taking one leg off, trying switching them! The objective is now is to switch your legs in a slow, smooth manner – one lifts off the wall while the other simultaneously moves back to the wall. Once you get comfortable with this, it’s time to take both legs off the wall! BOOM! Your first handstand! Are you doing it right? A good way to tell would be to record your handstand practice and review it against the videos here to check your form. Want to have an expert review your form? Check out our 1-on-1 Online Coaching Program! Our spiffy mobile app lets you send a video of your handstand directly to your coach, who will provide feedback so you can perfect your technique. They’ll also build a workout program that’s custom to your situation, which will have you doing handstands like Luke Skywalker in no time! 4 Tips and Tricks for Doing HandstandsNothing beats patience and hard work, but there are a few tips and tricks we can provide that will allow you the best chance for success. #1) Make sure you go through a proper warm-up: We’ve given you several options for the wrists and shoulders. Not only will a warm-up help prevent injury, but it will get the muscles and joints properly prepared to get the most out of your training. #2) Prioritize Your Handstand: You can work the skill on its own time, and it won’t interfere or be interfered by anything else, but what if you’re doing other exercises during your workout? When do you handstand, when you’re training in a swamp? The best time to work the balancing drills (like your wall walk) is at the beginning of your workout, after you’ve warmed up. These skills require concentration and a fresh focus to really benefit and progress with them. Trying to balance after you’ve exhausted yourself with a tough cardio session is an exercise in futility (pun intended). The best time to work the positional drills (like your quadruped rock) would be sometime during your strength session, and before your cardio. These drills are not as dependent on completely fresh muscles, but we still don’t want to try and hold ourselves upside-down after a grueling workout. #3) Don’t do too much, too soon. We’ve mentioned this a million times because it’s so important. Taking on too much too soon is a way to develop bad habits and possibly injure yourself. Take your time! Enjoy and really master each step! #4) Take it Easy: In the same vein, we want to look for success. What do I usually see when people practice handstands: Someone kicking up 100 times and kinda getting a handstand once or twice. How much sense does that make? While we might not be batting 1,000 with all our attempts, but we should be looking to successfully complete around 8 out of 10 attempts. If we’re not? Then we might have taken on too much, too soon! Let’s wrap up this guide and give you some next steps for your handstand practice. The 5-Minute Rule: Practice Handstands Every Day and Be Amazed at What HappensCommit to 5 minutes a day. That’s it. But do it every day. I’ll see a lot of people go all-in for a single handstand session, and then not touch the skill for a week or more. Dan Gable once said, “If it’s important, do it every day.” Now, this is a simplification, but with handstands, this is ESPECIALLY important. When you first start out, your arms and shoulder may only be able to do 5 minutes before they are DONE. Doing them for a short time each day is the best strategy to improve strength, endurance, and balance. Want help progressing with handstands from here? I’ve got 3 great options for you! #1) If you want step-by-step guidance on how to complete handstands, get stronger, and even eat better, check out our killer 1-on-1 coaching program: #2) Exercising at home and need a plan to follow? Have questions you need answered? Join Nerd Fitness Prime! Nerd Fitness Prime contains at-home exercise routines, live-streamed workouts with NF Coaches, a supportive online community, and group challenges. Plus, you’ll gain access to all our online courses, including Nerd Fitness: Handstands, which will help you become a master at flipping upside down! #3) Join The Rebellion! We have a free email newsletter that we send out twice per week, full of tips and tricks to help you get strong, get healthy, and have fun doing so. I’ll also send you tons of free guides that you can use to start leveling up your life too:
Get your Nerd Fitness Starter Kit
Alright, your turn: Have you ever tried to kick up into a handstand? What’s the one thing holding you back? What questions can I answer? -Steve PS: One day I’ll be able to type articles like this while doing a handstand. Jim, our lead trainer for Nerd Fitness Coaching, makes it look so easy: ### Photo sources:[3]
Footnotes ( returns to text)
via https://www.nerdfitness.com/blog/a-beginners-guide-to-handstands/ One of the best exercises for you, whether you’re trying to build muscle or lose weight (or both) HAS to be the squat. However, it’s also an exercise I see nearly EVERYBODY do incorrectly. We do video form checks with every Online Coaching Client to make sure they’re squatting correctly, and we use a LOT of the same cues and instruction we cover in this guide! So have no fear… After reading this big ass squat guide (pun intended, I suppose?) – part of our Strength 101 series – you can start performing this compound exercise safely and effectively. Click any link below or scroll down to read the whole guide:
What Are the Benefits of Squats?Squats are one of the most foundational functional movements in our lives. Let’s talk about the benefits and why you should be squatting all the time. #1) We’re designed to squat: We’ve been squatting since we were babies, but as we get older and sit in unnatural positions all day, our squat form goes from perfect to terrible. Crap. In many countries, people often sit in a full squat for hours at a time. From an evolutionary standpoint – it makes sense that we are genetically designed to, and can be really good at – squatting. Before modern-day furniture and technology, you didn’t stop sitting in a full squat once you got older like we do today…you continued squatting your entire life. That’s why squatting is one of the key moves for functional fitness. #2) Squats are a compound movement that recruits most of our muscles – this means it’s a movement that uses multiple muscle groups and joints (your hip and knee joints) to complete. A simple bodyweight squat – which I’m demonstrating above – uses almost every muscle in the core and lower body. If you add a dumbbell or barbell into the equation, I would even argue that they use every single major muscle group to complete. In addition to every muscle in your “legs,” you need your:
Nothing is left out with this monster movement. Because of the utilization of a large amount of muscle groups, squats cause your body to increase our anabolic hormone production, helping us lose fat and build muscle.[1] #3) Squats will help strengthen your bones and your muscles (and your knees!), and can also increase flexibility. Increasing the strength in your knees and hips (and entire body) reduces your chance of injury while doing both athletic movements and everyday life things (such as shoveling the driveway or standing up and sitting down). And by learning to squat deeply, safely, you’re improving your range of motion and helping make you antifragile and protecting yourself against future injury. Bazinga! If your goals are to:
In short, squats are amazing. (See what I did there?) My name is Staci Ardison, I’m a Senior Coach at Nerd Fitness, and my life has been absolutely transformed by barbell training, which is why I’m so excited to share this guide with you. Back in 2011, I could barely pick up a pink dumbbell, and now I regularly compete in powerlifting competitions. Here I am squatting 253lbs for 3 sets of 5 at a bodyweight of 150 pounds: I am so excited to teach you how to squat today, as I’ve taught tons of coaching clients how to get started too. Let’s start off by taking a look at the bodyweight squat – the first move you should master before you add weight. How to Do a Bodyweight Squat With Proper Form
The setup for the squat exercise is incredibly simple.
I go over the setup and the full movement in this video: 1) Put your arms straight out in front of you, parallel to the ground. Keep your chest up and proud, and your spine in a neutral position. 2) Your weight is on your feet – it should be on the heels and the balls of your feet, as if they were pasted to the ground. You should be able to wiggle your toes the entire movement (though that’s not a part of squatting!). 3) Keep your entire body tight the entire time, your core flexed like you’re bracing to be punched in the gut! 4) Breathe deeply into your stomach, break at your hip and push your butt back. Keep sending your hips backwards as your knees begin to bend. It’s important to start with your hips back, and not by bending your knees. 5) As you squat down, focus on keeping your knees in line with your feet. Many new lifters need to focus on pushing their knees out so they track with their feet. When your knees start to come inside the toes, push them out (but not wider than your feet).[2] Make sure your knees aren’t moving inward toward each other through the movement – this is very common. 6) Squat down until your hip joint is lower than your knees (what we call “parallel” in the squat game). Note: if you THINK you might not be squatting deep enough, you probably aren’t!
Once at the bottom, it’s time to stand back up from your squat: 7) Keeping everything tight, breathe out and drive through your heels (keep the balls of your feet on the ground as well). 8) Drive your knees outward (away from each other) the same way you did on the way down, and squeeze your butt at the top to make sure you’re using your glutes. Here is a video from us nerds at Team Nerd Fitness (with instructions from Jim, lead trainer at our 1-on-1 Online Coaching Program) that will teach you good form on a bodyweight squat, including all the mistakes NOT to make: Once you can do multiple sets of 15+ deep bodyweight squats with proper form, it’s time to move onto barbell squats! If you are confident in doing bodyweight squats and want to work up to a barbell squat, follow our Gym Workout Level 4 Program, which includes dumbbell goblet squats, a good stepping stone to barbell squats: The majority of the population has some sort of mobility issue (including myself!) that they are working on fixing. We have LOTS of 1-on-1 coaching clients who are new to squatting, and it often comes down to ankle flexibility and hip mobility. If you spend all day, every day, sitting in a desk chair, this might be you. If you want us to help you fix your squat depth and start getting stronger, that’s what we’re here for! How to Set Up Properly For The Barbell Back Squat#1) Find your squat rack! It’ll look something like this, with an unattached barbell: A. Squat Stand: B. Power Cage/Squat Rack: C. Half Rack (Least favorite*): *I don’t like Half-racks without adjustable safety bars – if you want to squat deep the barbell might hit the immovable bars! Not cool. Aim for the A or B options if you have the choice! Note: a squat rack is NOT the same thing as a Smith Machine, where the barbell is attached to the machine, and slides up and down two bars: You do NOT want a Smith Machine. You need a completely unattached barbell in order to do a barbell squat properly and safely. Don’t squat in a Smith Machine. #2) Set the height of the bar to be about the same height as your collarbone. Not sure how to set the height of the bar? I got you: If your options are either too high or too low, it’s always best to set the pins slightly lower than you need them. You don’t want to have to get up on your toes to rack/unrack the bar, especially as the weight gets heavier. #3) Decide if you are going to do a high bar squat, or a low bar squat. Either is fine, but there IS a difference:
The “Low Bar Back Squat” is the most common form done by beginners, general lifters, and powerlifters. It’s also the form taught in Starting Strength, one of the best books for beginners on the market. So we’ll be focusing on that version for the rest of this section: #4) Always squat with just the bar to start – as we discuss in “How much weight should I be lifting,” even if you’re planning on squatting 500 lbs, always start with just the bar! How to Do a Proper Barbell Back Squat, Step By Step1) Facing the bar, step under it, and put your hands around it on either side of you. For this type of squat in our example, we are going to want a thumbless grip, so that our wrists are properly aligned with our forearms. The width of your grip will be dependent on flexibility, but generally, a narrower (hands closer to your shoulers) grip will help create a meaty shelf for you to place the bar on the muscles in your upper back. If you lack the flexibility for the narrower grip (which is super common), start out wider, then slowly bring it in as you get more flexible. See the difference here between a “high bar, wrapped grip” (Left) and “low bar, thumbless grip” (right): And now time to DO A BARBELL BACK SQUAT! Definitely watch the video above and listen to the instructions, and then read this description when you need to restart:
Not sure if you squatted deep enough? Record yourself! 95% of the people I see doing squats in a gym don’t go deep enough! Nervous about squatting correctly? Yes, I am a mind reader, and yes we can help you! If you want an expert to check your squat form check out our 1-on-1 Coaching program. Our coaching app lets you record and send a video of your movement directly to your coach, who will provide specific feedback and build a custom program just for you. Interested? Click below to jump on a free call with our team to see how our online coaching program will get you the results you’re after: How To Bail Out of a Squat SafelyIf you are going to squat, you have to know how to “fail” at squatting safely! After all, there’s nothing scarier than being stuck in the bottom of a squat movement and not knowing how to get out of there! A squat is very different from a barbell deadlift in that aspect: if you fail on a deadlift, you just don’t pick up the weight. If you fail on a squat, you’re trapped under a bar…with potentially a lot of weight on it. This can lead to SERIOUS injury. So please, learn how to bail out of a squat safely before you start attempting to do heavy barbell squats. This will help give you the confidence to push yourself and get stronger! 7 Common Mistakes When Doing SquatsThe squat is a basic movement, but those new to lifting often fall victim to a handful of common mistakes. Let’s take a look at some of the big problems and how to fix it! #1) Coming up on your toes with your knees forward during your squat It’s important to keep your heels on the ground the entire time you’re squatting. You should be driving down through your heels, and in order to do that, they need to be on the ground! While some of your weight will be on the balls of your feet, you never want all of your weight to be on the balls of your feet or your toes. You should be able to lift your toes up off the ground and wiggle them at any point and it shouldn’t change anything about your squat. #2) Not going deep enough on your squats Your squat should hit at least parallel (middle image above) – where your hip joint goes below the knee. Depending on what you’re training for, you can go lower, but in order to maximize the muscles worked in the squat, it needs to be done to at least parallel or lower (you can see lower in the upper right image). If you squat above parallel (a partial squat) you’re leaving the hamstrings out of the movement. This puts more pressure on the knee – the force put on your knee is actually reduced as you drop below parallel. Unfortunately, there’s a lot of misunderstanding about squats and knee issues. The deeper the squat, the more glutes that are activated as well. Deeper is typically harder, both strength and flexibility wise. However, depending on your goals, squatting to parallel may make more sense. If you’re struggling hitting depth there could be many causes – you could have poor ankle mobility, tight hip flexors and/or hamstrings, weak glutes, or poor pelvic alignment (among many other things). This is something we work closely with our coaching clients on, and often prescribe ankle and hip mobility drills to help clients reach proper depth on squats! #3) Knee Positioning When you squat, you want your knees to track along with your toes. This means if you are looking down at your knees and feet, your knees should be aligned at the same angle as your feet throughout the movement. Everyone’s exact positioning is going to be slightly different, but they should not be on the outside or the inside of the foot. #4) Back Positioning Your chest should be up and your shoulders should be back, like you’re King Kong about to pound your chest proudly. Your body should stay in this position the entire time. You don’t want your shoulders to round forward, but you also don’t want to hyperextend your back either. Keeping your spine in a neutral position will help your spine safe and build a strong foundation throughout the heavy squat movement. #5) Head Positioning Many coaches will tell their lifters to look up, as that is the direction in which you want to be moving, but this is actually the last thing you want to do. Take a second quick and look at the ceiling (I’ll wait! ? ). Now, see that position your neck vertebrae are in? That is a very unsafe position for your spine to be in, especially when more weight starts getting included in the equation. You also don’t want to be looking directly at the floor. Look straight out in front of you the entire time, with your head in a “neutral” position. Your chin should be in a position where you could hold a tennis ball between your chest and your chin. #6) Attempting to keep your shins vertical. Unless there is a current underlying knee issue that would cause additional pain – the shin can and should go past vertical in the squat. This will often allow a deeper squat which will build more strength and stability in the knee. A forward lean in the shins is also present when we engage in any number of daily activities such as walking up steps or standing up from a chair. Squat as deep as you are able, but do not focus on holding a vertical shin.” #7) Too much weight on the heels/on the outside or inside of feet during your squat When trying to fix coming up on your toes, or your knee positioning, it is common for people to focus so much on keeping their weight on their heels that they forget to keep the balls of their feet on the ground! Some of your weight will still be on the ball of your foot – if you are truly only having weight on your heels, it’s pretty hard to balance. To the same effect, if the inside of your foot or the outside of your foot comes up off the floor, this is also not a good thing! How do you know if you’re making these mistakes? Simple! Record yourself doing squats. I do. And so does anybody else who is serious about improving their squats. Often we look VERY different than we think we look when doing an exercise, so having a video of the movement is often the only way we can improve. If you can’t self-diagnose your squat challenges, let us help! Squat Variations for Beginners (Box Squat):In this section, we’re going to go over some squat variations to help you improve your form and build confidence before hitting the free weights section of the gym. If you’re struggling to do a squat correctly, don’t fret! I’m going to teach you about… BOX SQUATS! Squatting to a box will help teach you to sit back and keep your weight on your entire foot, instead of squatting with your knees forward and up on your toes. Squatting back to a box is also great for people who have bad knees and can’t do bodyweight squats anymore. You can do box squats with a barbell as well, but for this explanation, we’re just going to keep it simple with bodyweight box squats. In order to do this, find a box or a chair that is the right height so when you sit on it, you are at parallel with your squat. Your options include things like step stools, milk crates, or the smallest box at the gym (there’s usually a set of plyo boxes, and the shortest is around 10″.) The lower the box, the more it will help you develop stronger hips and low back – the box at exactly parallel will help you more with quad strength. Set up exactly as if you were going to do a regular bodyweight squat, only standing about a foot in front of the box. 1) Breathe in deeply, brace your core, move butt back, and keep your knees in line tracking in the same direction as your toes and squat back until you sit completely on the box. Don’t plop back on the box, make it slow and deliberate while keeping your entire body tight. 2) Now, don’t move! Think about your positioning:
Great, now stand up by driving your hips upward, don’t let your weight shift forward and onto your toes (drive through your heels!), shoulders and chest up, knees out keeping them lined up with your toes. For your first few, feel free to sit on the box while you evaluate your positioning, but as you get better at them, sit back and then quickly stand up again. You know you’re doing a good squat when you can stand back up from the bottom of a squat position without having to lean forward and use momentum to get up. You can squat, touch your butt to the box, and then stand back up without having to shift your weight around! KEEP THAT BUTT BACK! How to Perform a Front SquatIf you’re up for a similar-but-different squat, try… The barbell front squat! A front squat moves the weight from behind you to in front of you, which requires different muscles and mobility in different places. I personally alternate front squats and back squats on my leg days. Make sure you read our full guide on how to do a proper front squat. I know all of this can be overwhelming, so the important thing is that you START! I realize I sound like a broken record at this point, but I really want you to begin strength training today. We created our free guide, Strength Training 101: Everything You Need to Know, just for that purpose. I’d love to send it to you, because I know it’ll help you overcome any fears and confusion and have you getting stronger TODAY Get it when you sign up in this box below – I’m excited to hear what you think of it!
Download our comprehensive guide STRENGTH TRAINING 101!
How to Start Squatting Like A ProSquats are awesome. How awesome? Look at that woman above owning her squat before owning her putt! Once you’ve mastered the Back Squat, give Front Squats a try! And if you want to learn more about squats, or you’re looking to build more confidence before you get started, we have a few options for you: 1) If you are somebody that wants to follow a tailor-made program designed around their life and goals, check out our popular 1-on-1 Online Coaching Program. You’ll work with our certified NF instructors who will get to know you better than you know yourself, check your form, and program your workouts and nutrition for you. 2) If you want a snazzy app to teach you exactly how to start crushing squats, check out NF Journey. Our fun habit-building app helps you exercise more frequently, eat healthier, and level up your life (literally). Try your free trial right here: 3) Download our free Strength 101 Guide, which you can get when you sign up in the box below:
Download our comprehensive guide STRENGTH TRAINING 101!
And I’d love to hear from you! PLEASE leave your questions, squat or fitness or otherwise below so we can answer them and become best friends: What struggles do you have when trying to squat? What questions do you have? If you haven’t squatted before, what else do you need us to tell you to give you the confidence to start squatting TODAY!? -Staci PS: Be sure to check out the rest of the Strength Training 101 series:
PPS: I typed this whole article while sitting in a squat. Okay, no I didn’t, but that would have been cool. ### photo source: Barbell Squat, spotpoint74 © 123RF.com, power rack, squat stand, squat rack, Otmar Winterleitner © 123RF.com
Footnotes ( returns to text)
via https://www.nerdfitness.com/blog/strength-training-101-how-to-squat-properly/ Did you know that beet root powder is one of the most nutritious foods you can eat? It’s true. The beet is a root vegetable loaded with health-promoting nutrients, but if you don’t like beets, the powdered form works just as well. Beet root powder is simply a concentrated form of beets that contains the same health benefits. (Just one teaspoon of beet root powder is roughly equivalent to one beet!) Beet Root Powder NutrientsHere are just a few of the nutrients that beet root powder delivers: Fiber: Studies reveal that eating 25 g to 29 g of dietary fiber per day can reduce the risk of heart disease, stroke, type 2 diabetes, colorectal cancer, and obesity. Plus, research shows a high fiber diet may lower the risk of mortality from ANY cause!1 Iron: An essential mineral, iron is responsible for proper hemoglobin function. (Hemoglobin is a protein in the blood that carries oxygen throughout the body.) Iron is also involved with the production of many cells and hormones throughout the body. Protein: One of four macronutrients, protein is an essential building block of your muscles. Your organs, tissues, muscles, skin, hair...all contain protein, which is an indication of how important protein is to your body and your health. Plus, studies show protein is more satiating than carbohydrates or fats, a feature that can help prevent overeating and resulting weight gain.2 Magnesium: An essential mineral, magnesium is involved in more than 300 chemical reactions in the body. Magnesium is particularly important for proper muscle contraction, DNA repair, and energy production.3, 4, 5 Vitamin C: This popular vitamin is a potent antioxidant that supports a healthy immune system. It is also an essential part of connective tissue, important for wound healing.6 Manganese: This trace mineral is crucial for several bodily functions, including bone formation, blood clotting, and metabolism. You only need a small amount of manganese, and this can be obtained through diet or through supplementation.7 Potassium: A mineral and electrolyte found in many common foods, potassium helps regulate heart rhythm. It also assists with digestion, muscle contraction, and nerve impulses. Vitamin B6: A water-soluble vitamin, B6 is involved in more than 100 enzyme reactions in the body. Its main job, however, is protein metabolism.8 Folate: Also called vitamin B9, folate is essential for making red and white blood cells in the bone marrow. It also helps convert carbs into energy, which can help maintain weight. Folate also plays a key role in DNA and RNA production.9 Beets (and beet root powder) are also loaded with antioxidants that help defend against illness and diseases. Why Use Beet Root Powder?Though beets are one of the healthiest root vegetables, you may not like their sweet earthy taste. (Many people don't.) With beet root powder, you can get all the health benefits without having to cook and eat beets. Beet root powder is convenient and versatile, too. All you need to do is stir a couple teaspoonsful of powder into your smoothies, yogurt, or cereal to enjoy the health-boosting nutrients it has to offer. If you want even MORE nutrients, try Garden in My Glass, a proprietary blend of powdered fruits and vegetables -- including beet root powder -- shown to provide superior nutrition and health benefits. Click here to learn more about Garden in my Glass and to place your order TODAY! References: 1- Science News. High intake of dietary fiber and whole grains associated with reduced risk of non-communicable diseases. ScienceDaily. Jan 10, 2019. Accessed Jan 12, 2021. https://www.sciencedaily.com/releases/2019/01/190110184737.htm 2- Yancy WS Jr, Olsen MK, Guyton JR, Bakst RP, Westman EC. A low-carbohydrate, ketogenic diet versus a low-fat diet to treat obesity and hyperlipidemia: a randomized, controlled trial. Ann Intern Med. 2004 May 18;140(10):769-77. doi: 10.7326/0003-4819-140-10-200405180-00006. PMID: 15148063. 3- Costello R, Wallace TC, Rosanoff A. Magnesium, Advances in Nutrition, Volume 7, Issue 1, January 2016, Pages 199–201, https://doi.org/10.3945/an.115.008524 4- Hartwig A. Role of magnesium in genomic stability. Mutat Res. 2001 Apr 18;475(1-2):113-21. doi: 10.1016/s0027-5107(01)00074-4. PMID: 11295157. 5- Jahnen-Dechent W, Ketteler M. Magnesium basics. Clin Kidney J. 2012;5(Suppl 1):i3-i14. doi:10.1093/ndtplus/sfr163 6- US Department of Health and Human Services. Vitamin C: Fact Sheet for Health Professionals. National Institutes of Health. Updated: Feb 27, 2020. Accessed Jan 12, 2021. https://ods.od.nih.gov/factsheets/VitaminC-HealthProfessional/#:~:text=Vitamin%20C%20is%20required%20for%20the%20biosynthesis%20of,which%20plays%20a%20vital%20role%20in%20wound%20healing. 7- Fletcher J. What are the benefits and effects of manganese? MedicalNewsToday. Last medically reviewed: Jul 2, 2019. Accessed Jan 12, 2021. https://www.medicalnewstoday.com/articles/325636#risks 8- National Institutes of Health. Vitamin B6: Fact sheet for Health Professionals. NIH. Updated: Feb 24, 2020. Accessed Jan 12, 2021. https://ods.od.nih.gov/factsheets/VitaminB6-HealthProfessional/ 9- Ware M. Why is folate good for you? MedicalNewsToday. Jun 26, 2018. Accessed Jan 12, 2021. https://www.medicalnewstoday.com/articles/287677 Via https://store.sanesolution.com/blogs/supplements/beet-root-powder Via https://sanesolutions.weebly.com/blog/beet-root-powder |
AuthorHi its me Thomas Dahl living in Phoenix, AZ i am 35 years old. I am very concerned about health and for maintaining my good health i use best nutraceuticals. Archives
April 2021
Categories |